Bioinformatics on Big Data Module 3 Lab
This lab was created by George Mihaiescu
Introduction
Description of the lab
Welcome to the lab for Working Reproducibly in the Cloud! This lab will take you through the steps to setup and configure your virtual machine with Docker packages and will show you how to access data in the Cloud.
After this lab, you will be able to:
- Setup and launch a virtual machine
- Setup and launch a Docker container
- Configure a VM with Docker packages
- Learn how to access protected data in the Cloud as well as non-protected/public data
Things to know before you start:
The lab may take between 1-2 hours, depending on your familiarity with Cloud Computing and alignment tasks.
Requirements
- Laptop connected to OICR’s wifi network
- Web browser
- Collaboratory credentials
Note: The Collaboratory credentials you are given for the workshop will only work during the workshop.
Log In to the Collaboratory
In your browser, go to https://console.cancercollaboratory.org. Log in using your provided credentials.
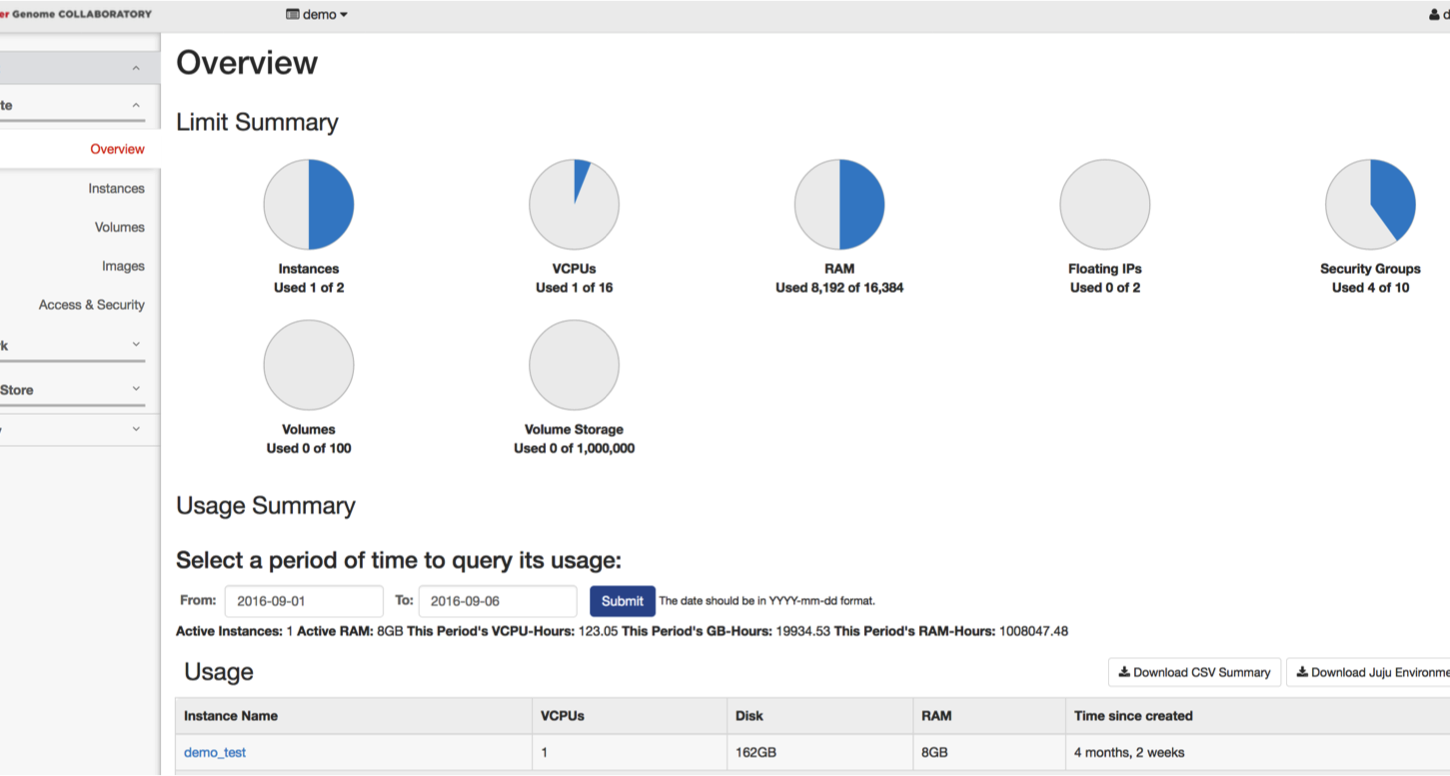
Once logged in, the first page open will be the “Overview Page” that shows how many resources the project you are part of has access to, as well as the current usage.
Before Launching a Virtual Machine
Create a SSH Key-pair
In the Collaboratory
This is the method we will be using for this workshop.
In the bar on the left of the page, click on “Access and Security.” At the top of the page, under “Access and Security”, select the “Key Pairs” tab. Click on the “Create Key Pair” button. Name your key-pair and click on the “Create Key Pair” button. This will prompt you to save a file to your computer. Take note where you save this because you will need to find it later.

Note: Collaboratory currently creates key-pairs that work only with Mac/Linux. If you create a key-pair with Collaboratory and want to use it with Windows, use PuTTY Key Generator to convert the key-pair to a Windows key-pair.
On Windows with PuTTY
If you are using a Windows computer and do not have access to Collaboratory the PuTTY Key Generator can be used to create SSH Key-pairs. Once the program is installed, open it and click on “Generate.”


Once the key is generated, you can add a Key comment (ie your name and the date the key was created) and key passphrases. The key can be saved as a public key or a private key.

On Mac/Linux
If you are using a Unix system and do not have access to Collaboratory in Terminal, the command ssh-keygen can be used to create SSH key-pairs. You will be prompted to enter a file name for the key and a passphrase. Leaving the file name blank will save the key /home/user/.ssh/id_rsa file.
ssh-keygen
Generating public/private rsa key pair.
Enter file in which to save the key (/home/user/.ssh/id_rsa):
Enter passphrase (empty for no passphrase):
Enter same passphrase again:
Your identification has been saved in testkey.txt.
Your public key has been saved in testkey.txt.pub.
The key fingerprint is:
SHA256:OnHW+VAa/n05qiS2V0HqHbaWAln9J0njgy9zbwYFIa8
You will need to change the permissions on the key. Use ls to view the files in your .ssh directory and chmod to change the permissions. Use cat to view the contents of the key file.
ls ~/.ssh
id_rsa
id_rsa.pub
chmod 400 ~/.ssh/id_rsa
cat ~/.ssh/id_rsa.pub
Import an Existing SSH Key-pair
Alternatively, you can import a key-pair by hitting the “Import Key Pair” button. You will need to name your key-pair and paste the public key into the text box. Click on “Import Key Pair” when done.
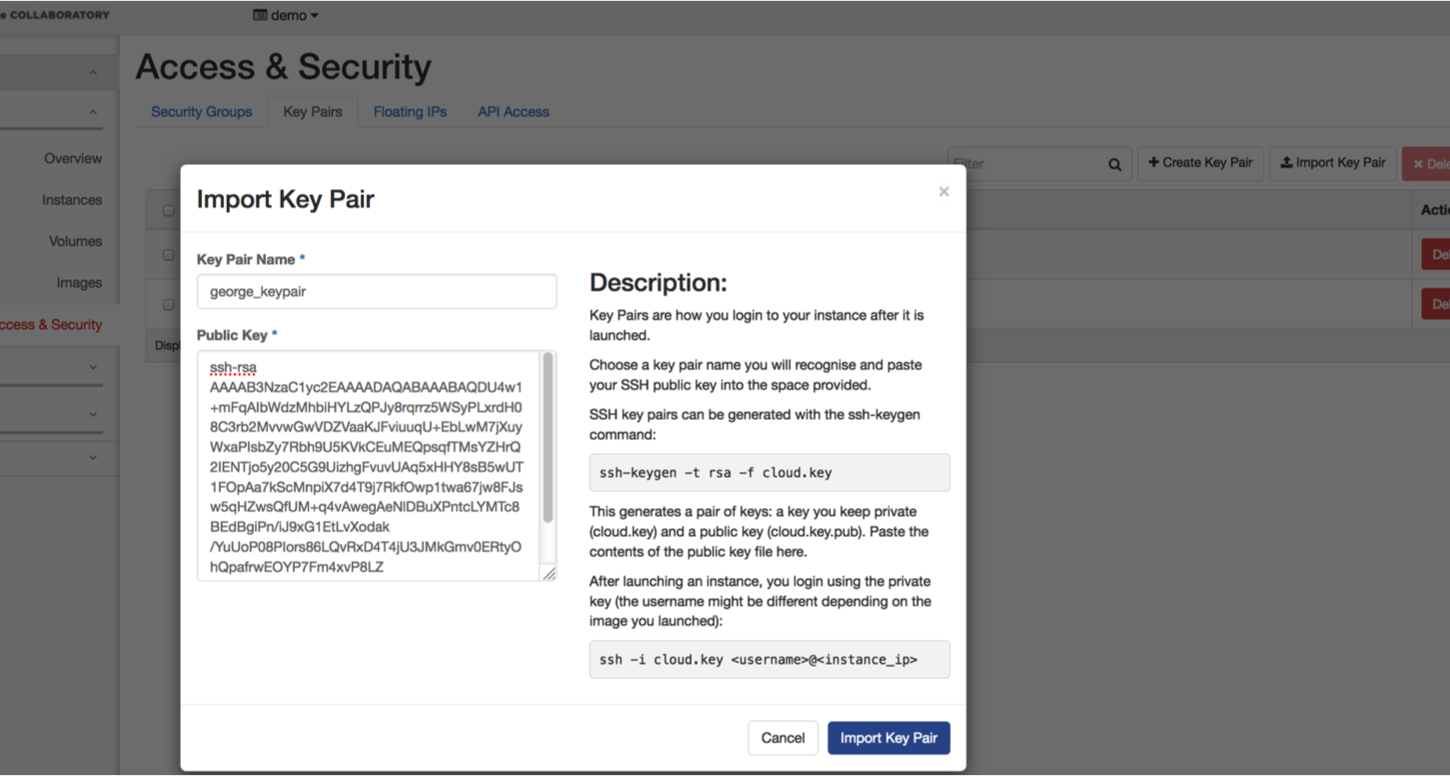
If you already have a SSH key-pair on your laptop that you want to use, feel free to upload the public key part by clicking the “Import Key Pair” button. Otherwise, choose the “Create Key Pair” option and download the private part of the SSH key that will be created.
Customize Your Security Groups
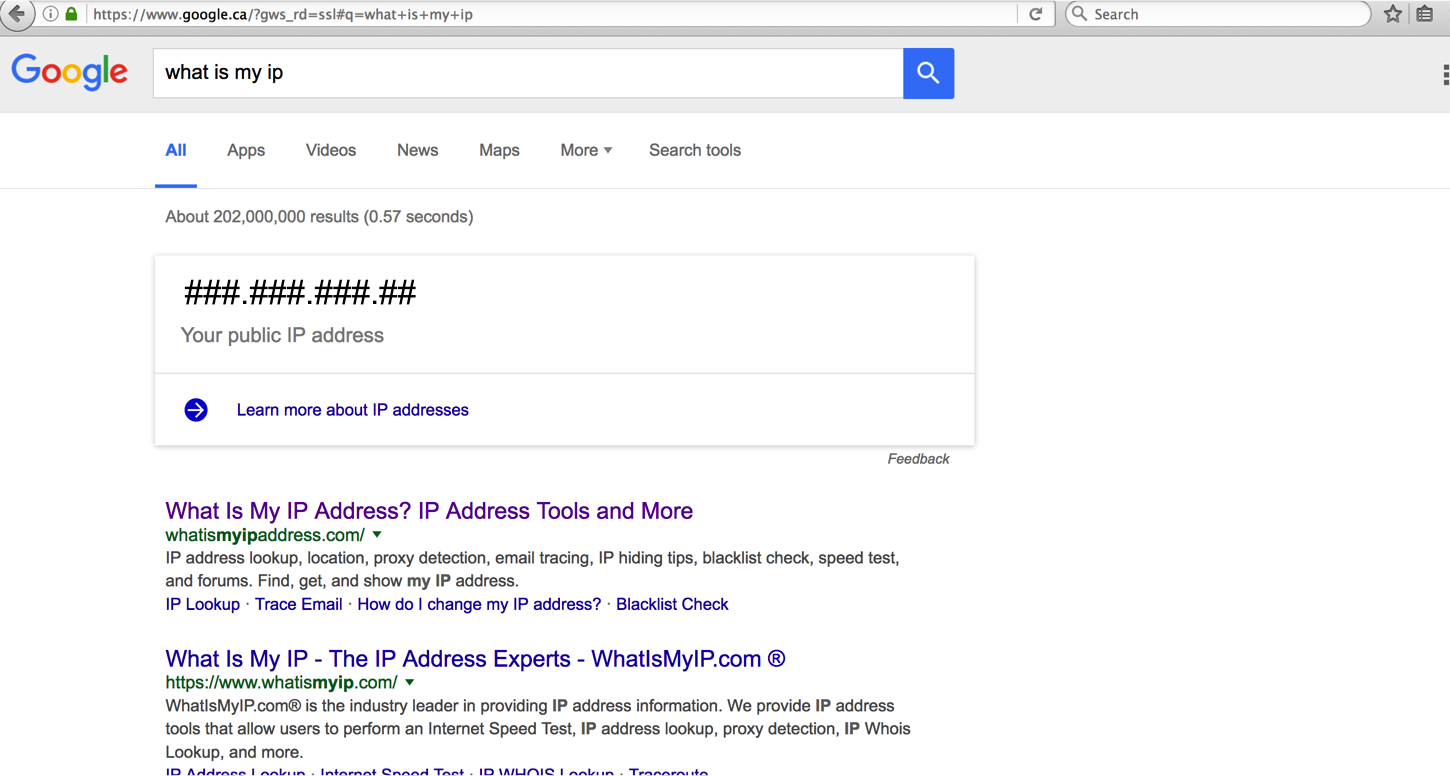
You will need to know your IP address for this. To find you IP address, open a new tab or window and go to Google and search for “what is my ip”.
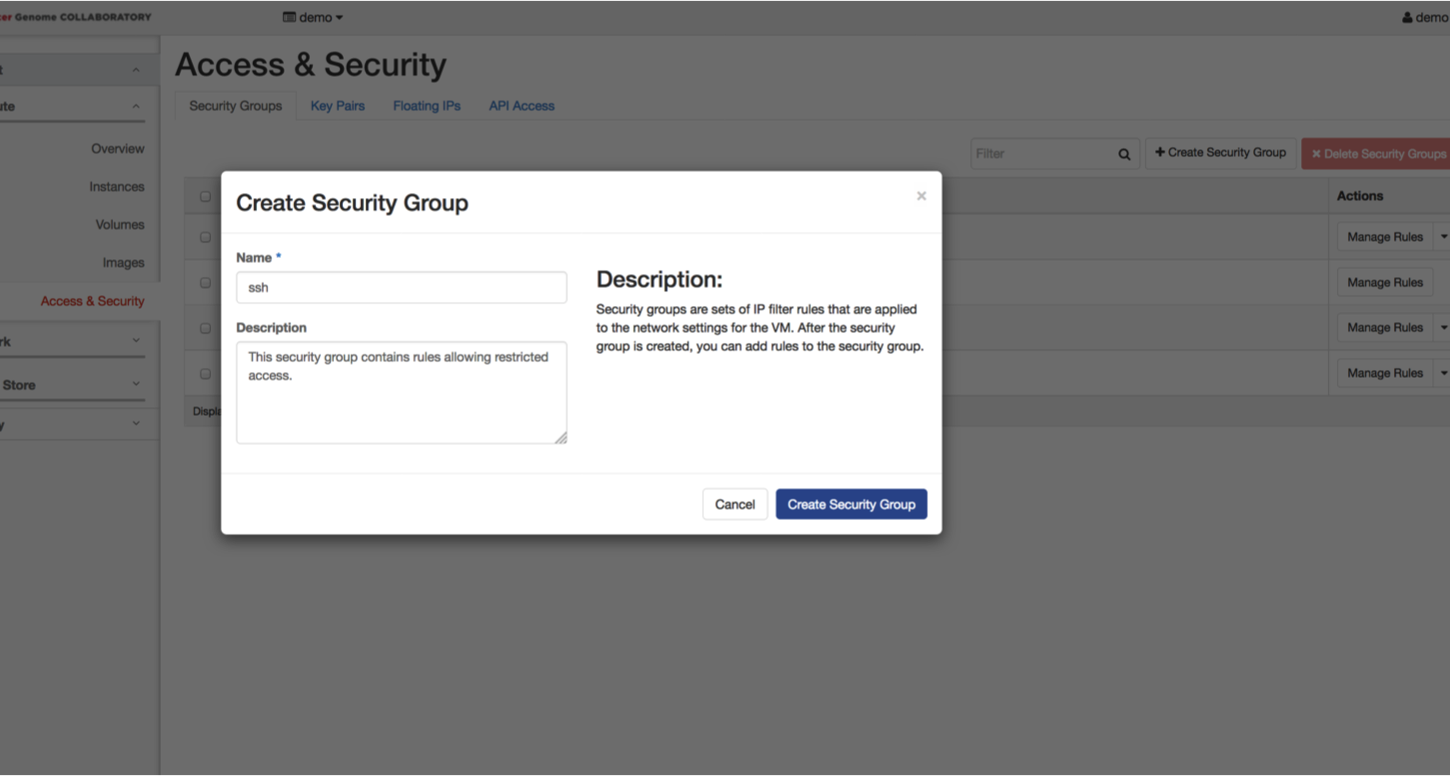
Return to the Collaboratory page. Select the “Security Groups” tab and click on the “Create Security Group” button. Name your security group (ie ssh_yourname) and write a description. Click on “Create Security Group”.
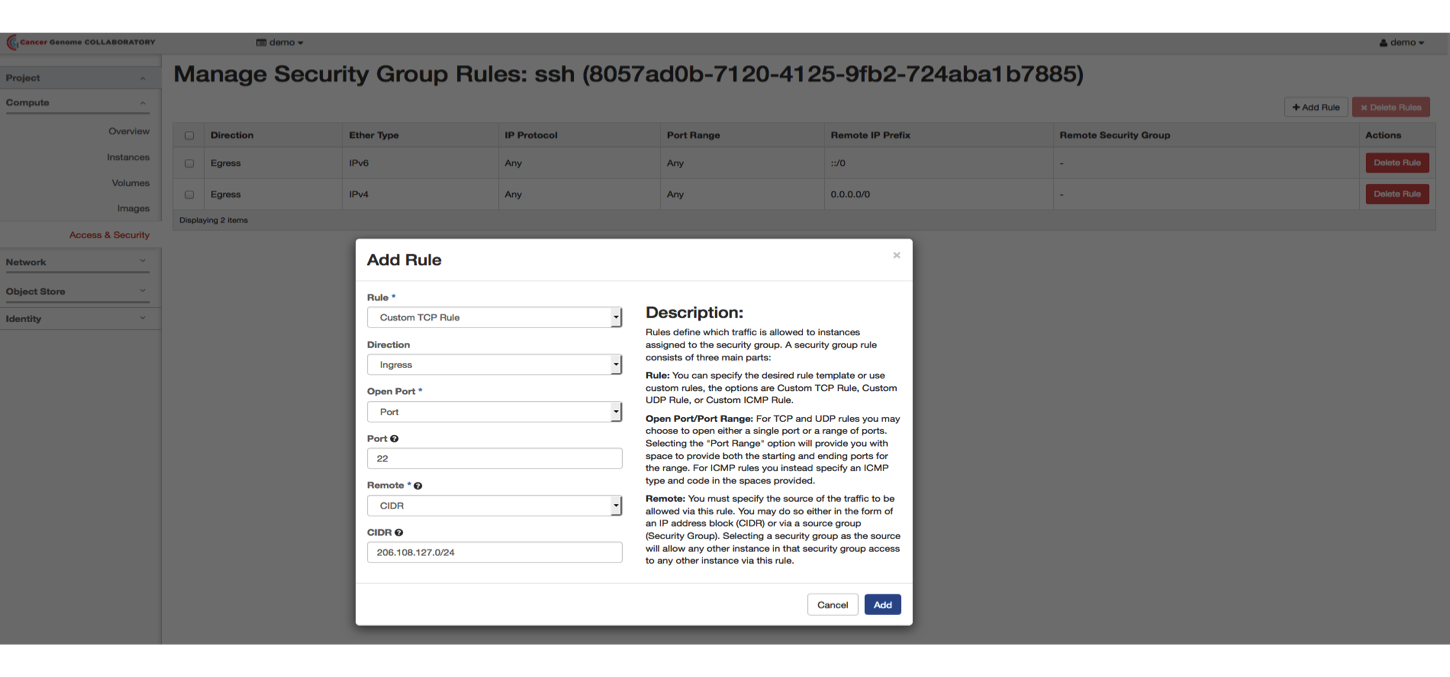
You will need to allow SSH access from your IP address. Beside the name for the security group you just created, click on “Manage Rules”. Click on the “Add Rule” button.
In the dropdown menus and boxes, select or enter:
- Custom TCP Rule
- Ingress
- Port
- 22
- CIDR
- your IP address
Repeat this step and add a second rule with allowing TCP port 80:
- Custom TCP Rule
- Ingress
- Port
- 80
- CIDR
- your IP address
Choose Your Flavor
In the menu on the left, select “Instances.” Click on the “Launch Instance” button.
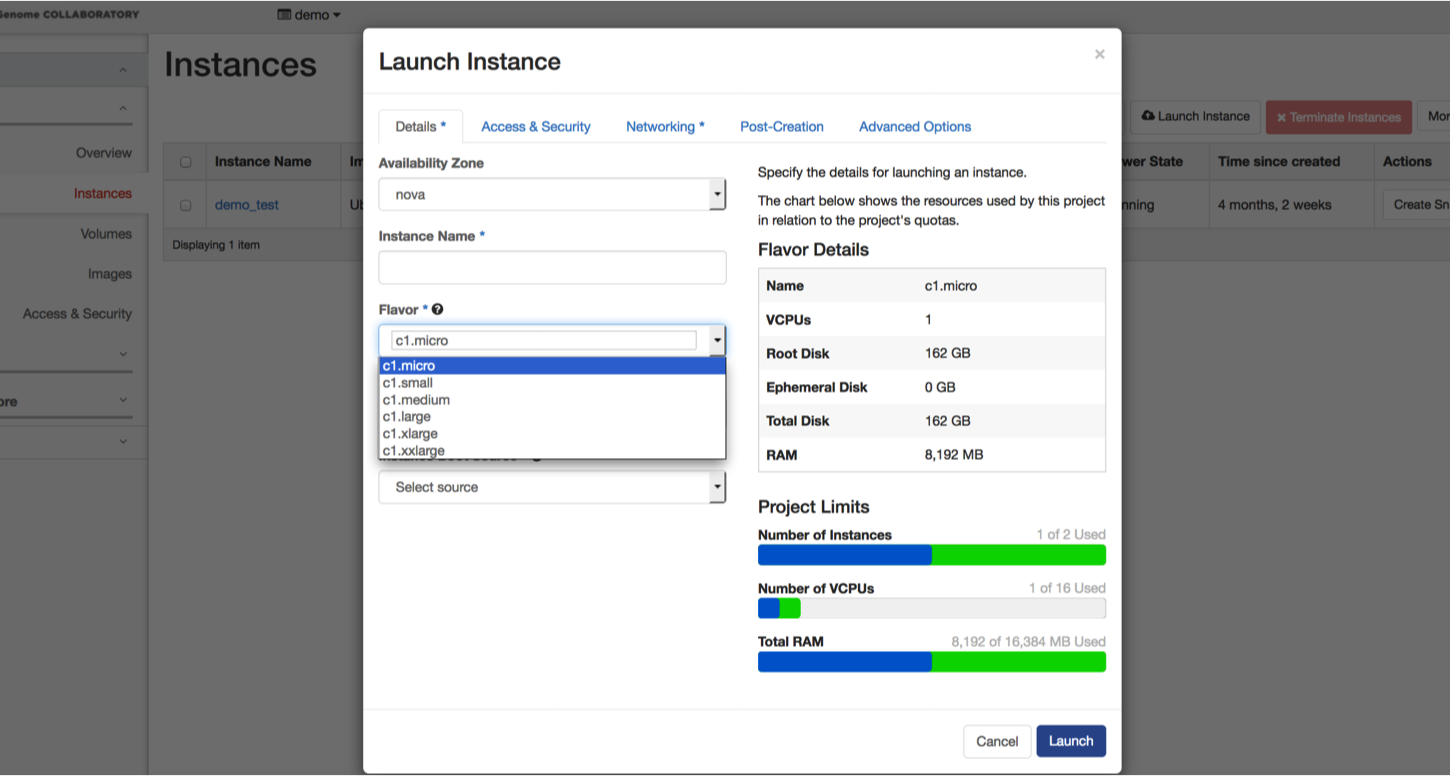
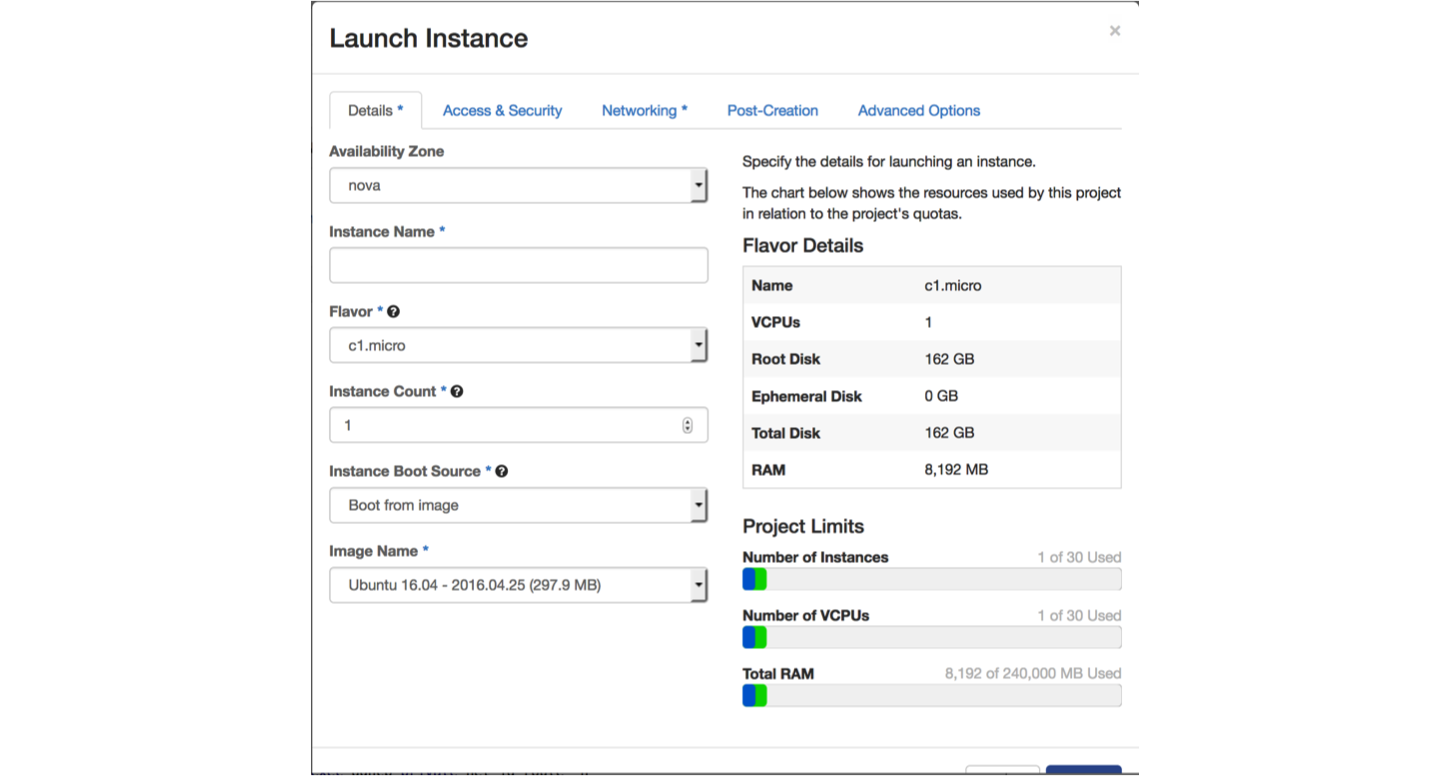
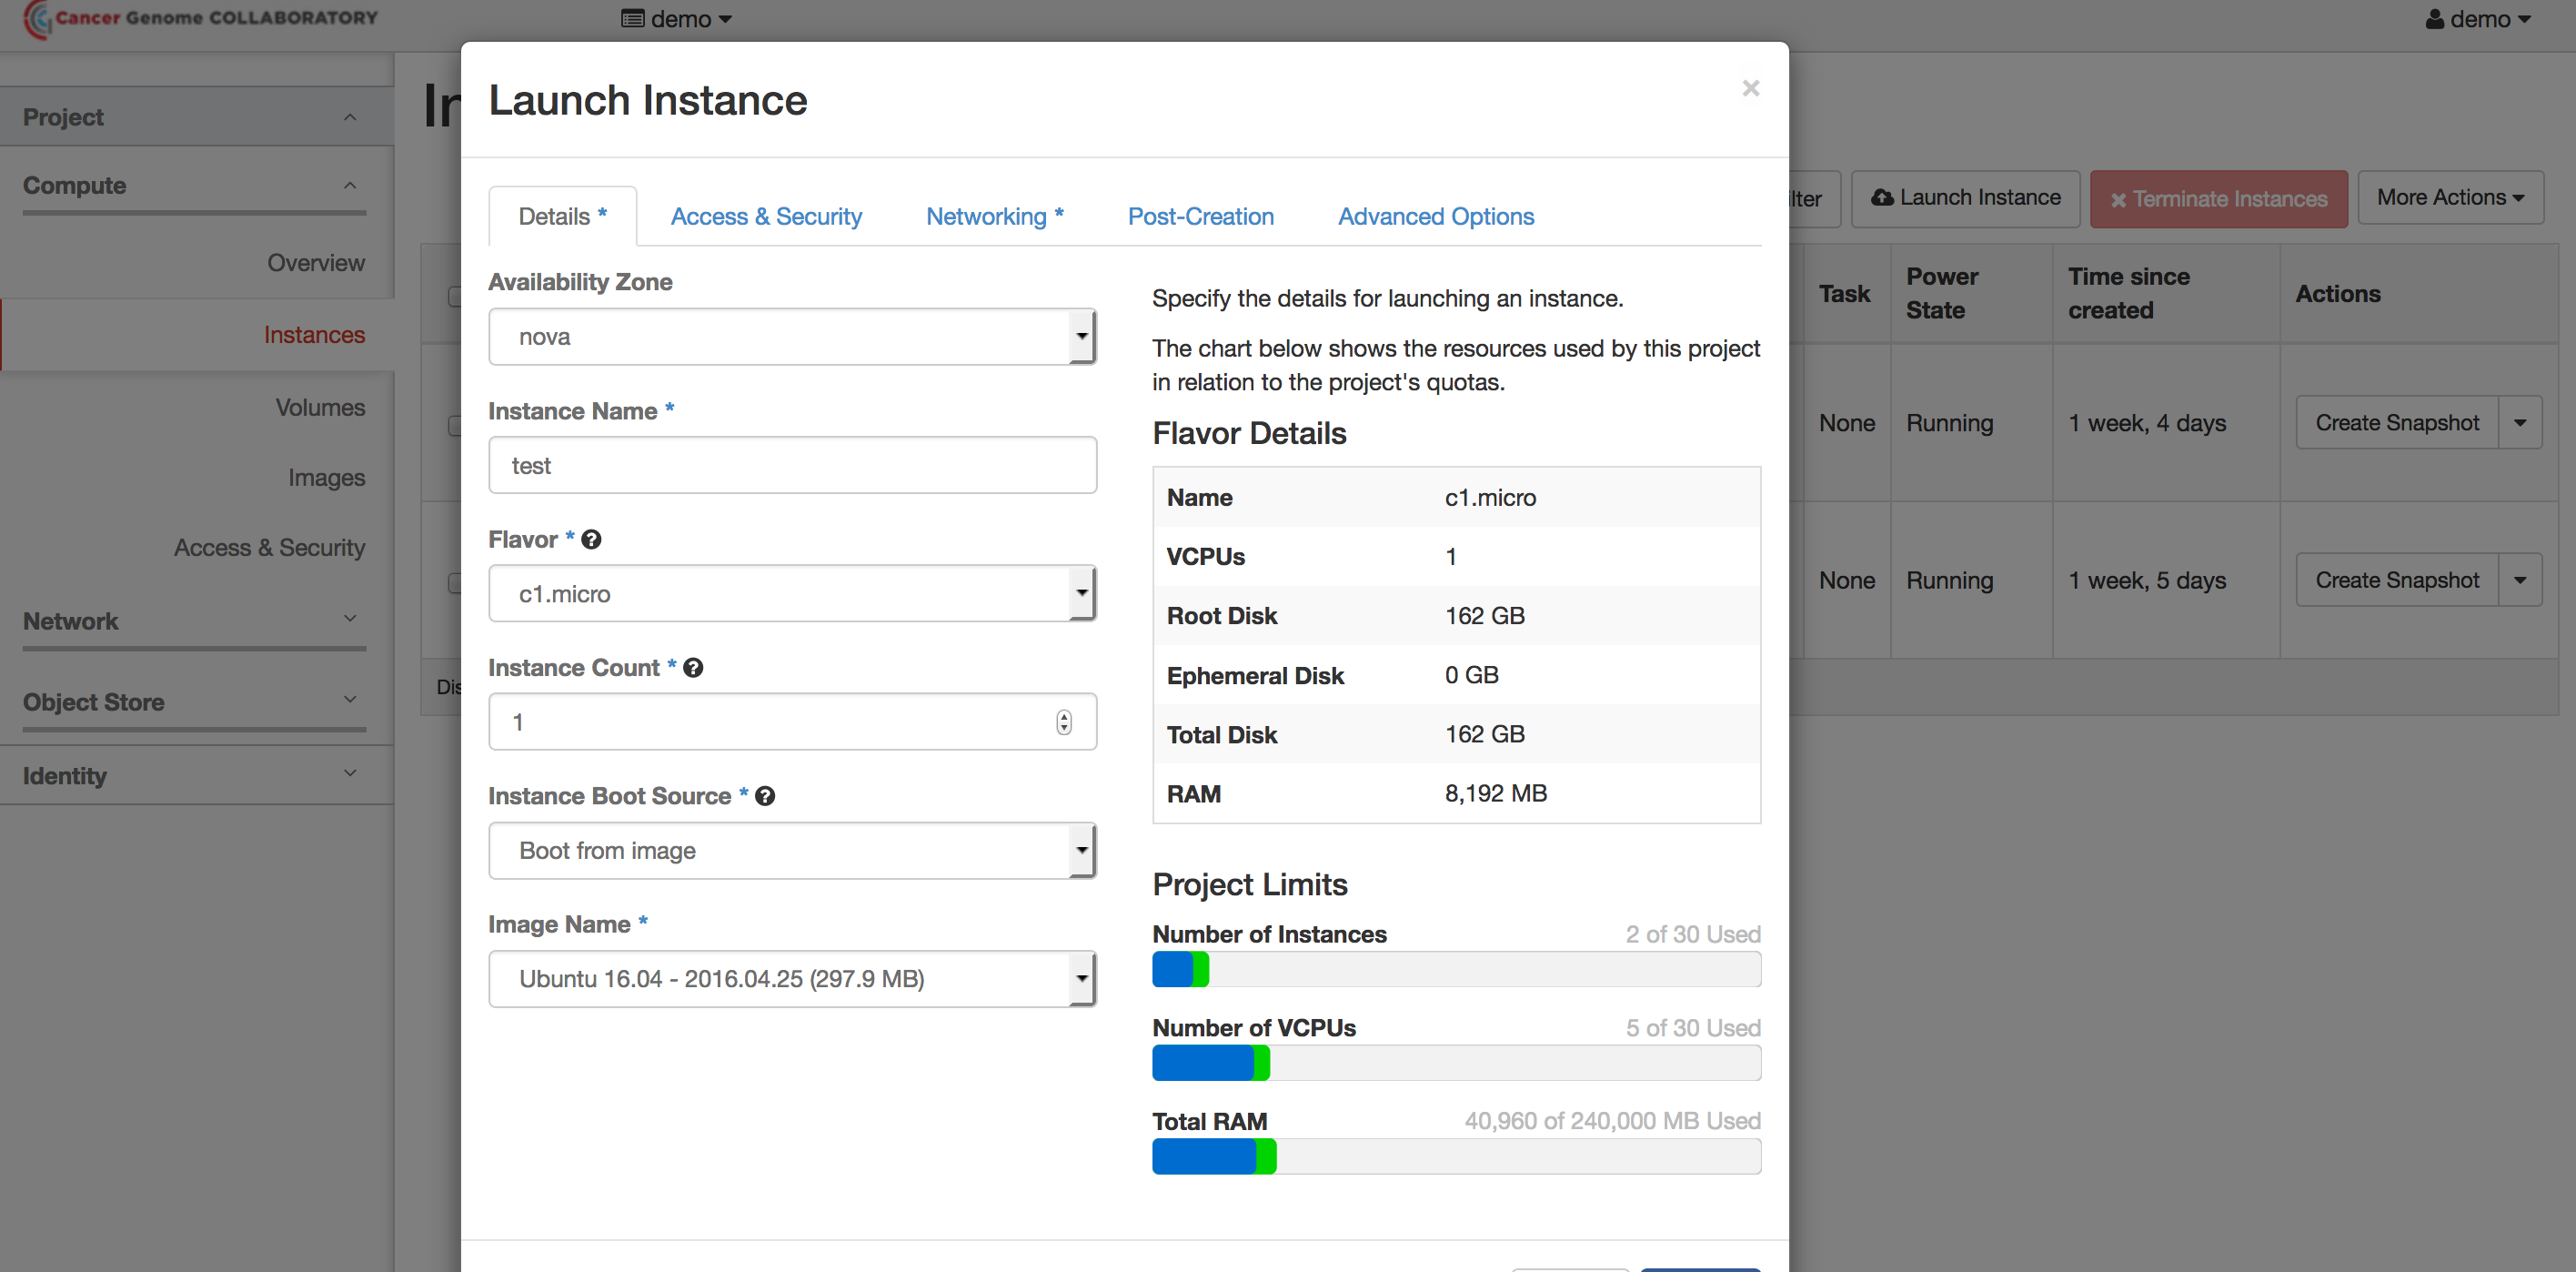
Make sure you are in the “Details” tab.
In the dropdown menus and boxes, select or enter:
- Nova
- Name you instance
- c1.micro
- 1
- Boot from image
- Ubuntu 16.04 - 2016.04.25 (297.9 MB)
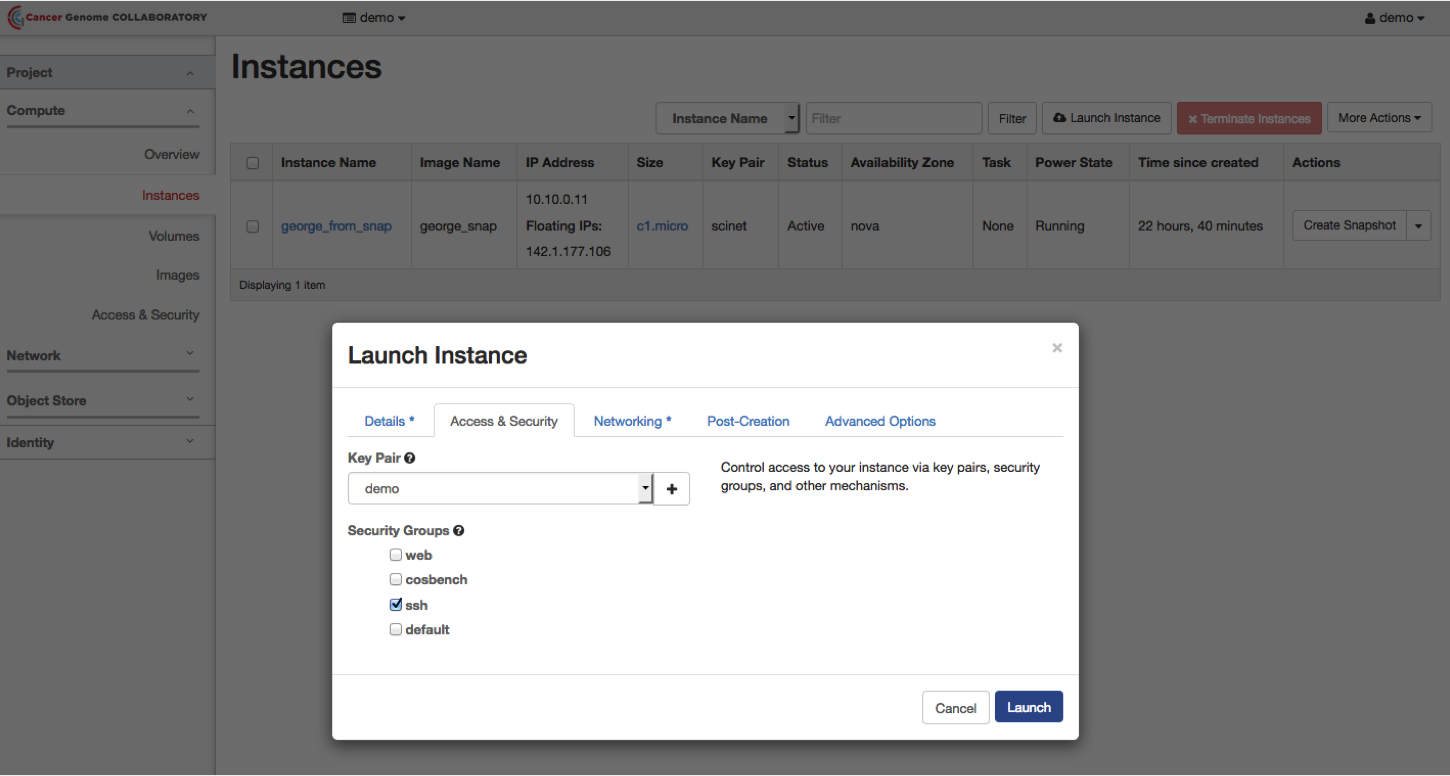
Select the “Access and Security” tab. Select the key pair you previously created and check the box beside “ssh”.
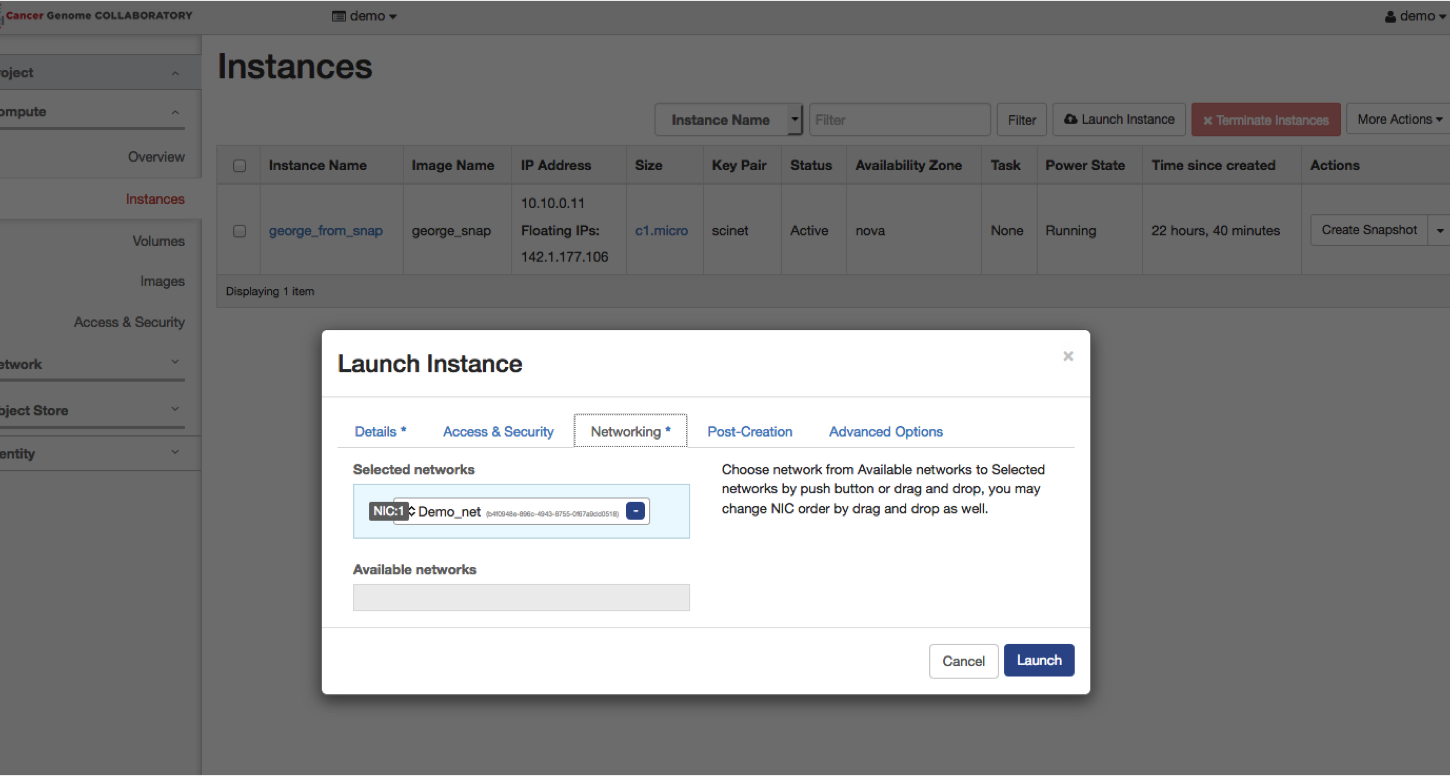
Select the “Networking” tab. Choose the appropriate network.
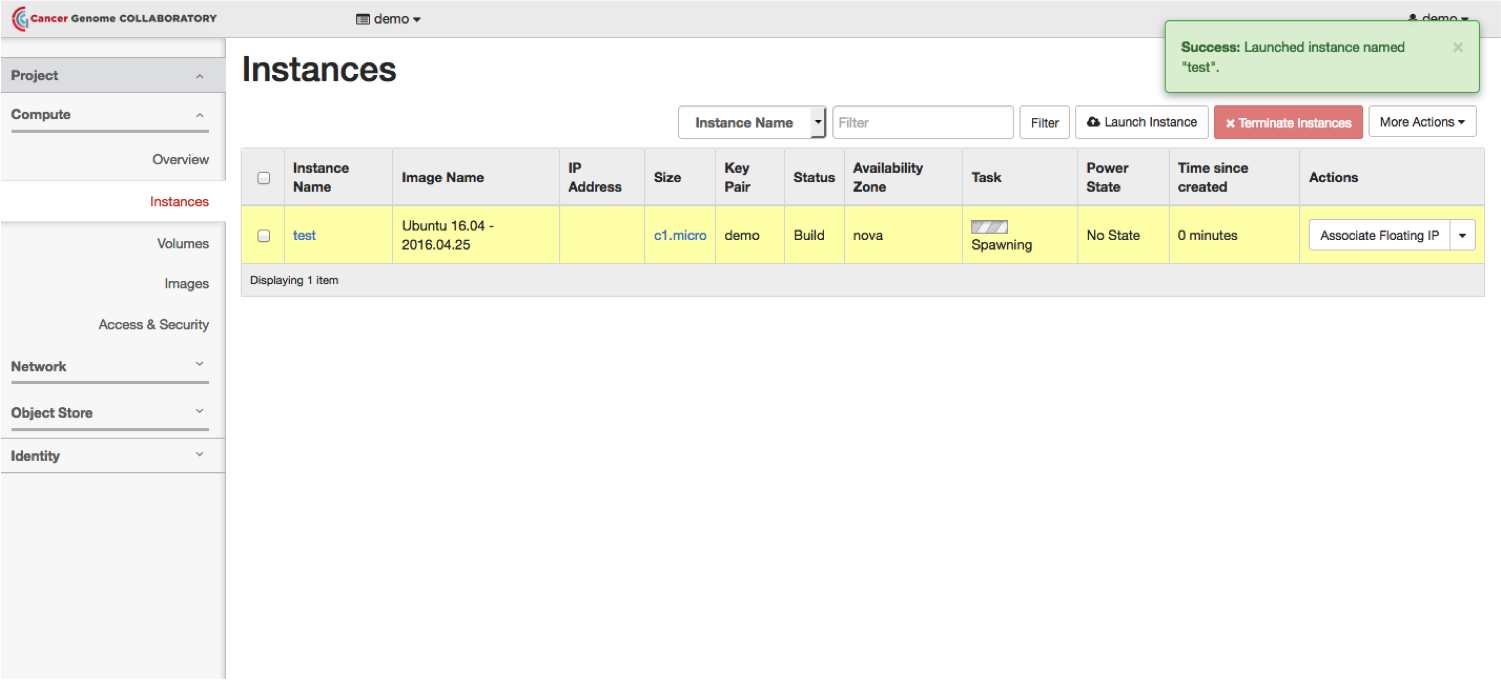
Launch the instance by hitting the “Launch” button.
It will take a few minutes for the instance to start.
To view your instances, in the left hand menu, click on “Instances”.
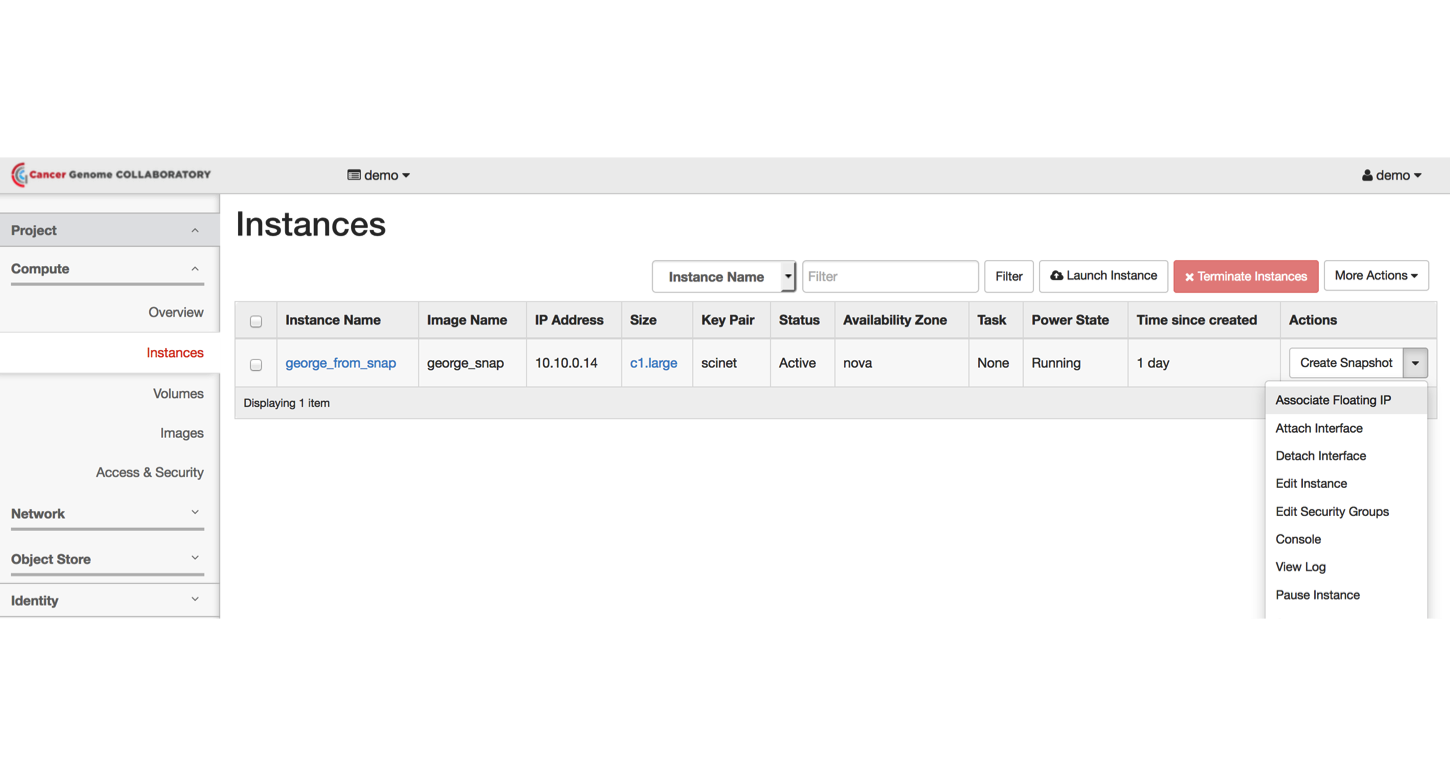
Associate a Floating/Public IP Address
By default, the VM will have a private IP allocated that is only reachable from inside your virtual network (other VMs connected to the same network).
It is recommended to associate a floating/public IP address only to a single VM and use that one as a “jumpserver”.
From the “Compute” menu, select “Instances.” Beside the name of your instance, select “Associate Floating IP.”
Log Into Your Instance
Mac/Linux Instructions
You will need to change the file permissions for your private SSH key.
chmod 400 path_to_private_key
Where path_to_private_key is the path to where you have saved your key after you created it in the first steps.
Then, to log in:
ssh -i path_to_private_key ubuntu@142.1.177.XXX
XXX is the last octet from the floating IP address you assigned to the instance.
Windows Instructions
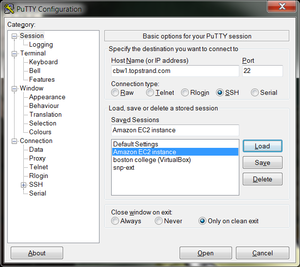
To configure Putty, start Putty and do the following:
- Fill in the “Host name” field with 142.1.177.XXX.
XXX is the last octet from the floating IP address you assign to the instance.
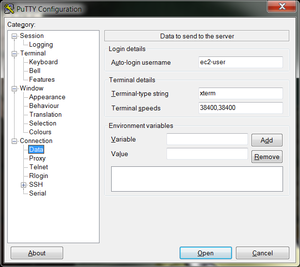
- In the left hand categories,under the Connection category choose Data. In the auto-login username field write ubuntu.
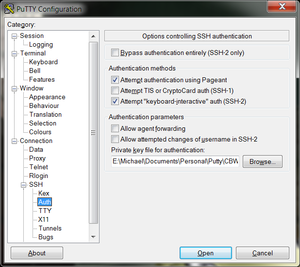
- In the left hand categories, in the Connection category next to SSH click on the +. Click on Auth. In the private-key file for authentication field, hit browse and find your private key, the file you downloaded previously.
- In the left hand categories, click on Session. In the Saved Sessions field write Collaboratory and click save.
Now that Putty is configured, all you have to do is start PuTTY and double-click on “Collaboratory” to login.
Customize Your Virtual Machine
You will need to upgrade your package index and existing packages by running:
sudo apt-get update && sudo apt-get upgrade
Docker Installation
Run the following commands to install the Docker engine software and required dependencies:
sudo apt-get install -y apt-transport-https ca-certificates unzip
sudo apt-key adv --keyserver hkp://p80.pool.sks-keyservers.net:80 --recv-keys 58118E89F3A912897C070ADBF76221572C52609D

echo 'deb https://apt.dockerproject.org/repo ubuntu-xenial main' | sudo tee /etc/apt/sources.list.d/docker.list

sudo apt-get update && sudo apt-get -y install linux-image-extra-$(uname -r) linux-image-extra-virtual

sudo apt-get -y install docker-engine

sudo service docker start

sudo docker run hello-world
This will install Docker and run hello-world to test the installation.
Run a Bioinformatics Tool in Docker
We will first need a data file. To get the file from the ftp server, we will use the wget command.
wget ftp://ftp.1000genomes.ebi.ac.uk/vol1/ftp/phase3/data/NA12878/alignment/NA12878.chrom20.ILLUMINA.bwa.CEU.low_coverage.20121211.bam
We will need the Docker container with the “bamstats” tool. We will use the Docker pull command to retrieve the container.
sudo docker pull quay.io/briandoconnor/dockstore-tool-bamstats
Run the container, mounting the sample file inside.
sudo docker run -it -v `pwd`/NA12878.chrom20.ILLUMINA.bwa.CEU.low_coverage.20121211.bam:/NA12878.chrom20.ILLUMINA.bwa.CEU.low_coverage.20121211.bam -v /tmp:/home/ubuntu quay.io/briandoconnor/dockstore-tool-bamstats
In this command, -it means run interactively and -v maps a file or directory from the VM inside the Docker container. Whatever is created inside /home/ubuntu (inside the container) will be in the host tmp directory. This will allow the files that are created to survive after the container is terminated.
The OS inside the Docker container is different than that of the host VM. You can check this with:
cat /etc/lsb-release
Recall that we chose Ubuntu 16.04 for our VM.
Inside the Docker container, execute the bamstats binary against the sample file.
cd && /usr/local/bin/bamstats 4 /NA12878.chrom20.ILLUMINA.bwa.CEU.low_coverage.20121211.bam
Exit the docker container by typing “exit” and go to “/tmp” where the report was created.
exit
cd /tmp
unzip bamstats_report.zip
sudo python3 -m http.server 80
Visit the page to see the statistics for that sample BAM: http://142.1.177.XXX/bamstats_report.html
XXX is the last octet from the floating IP address you assigned to the instance.
Access Data in the Cloud
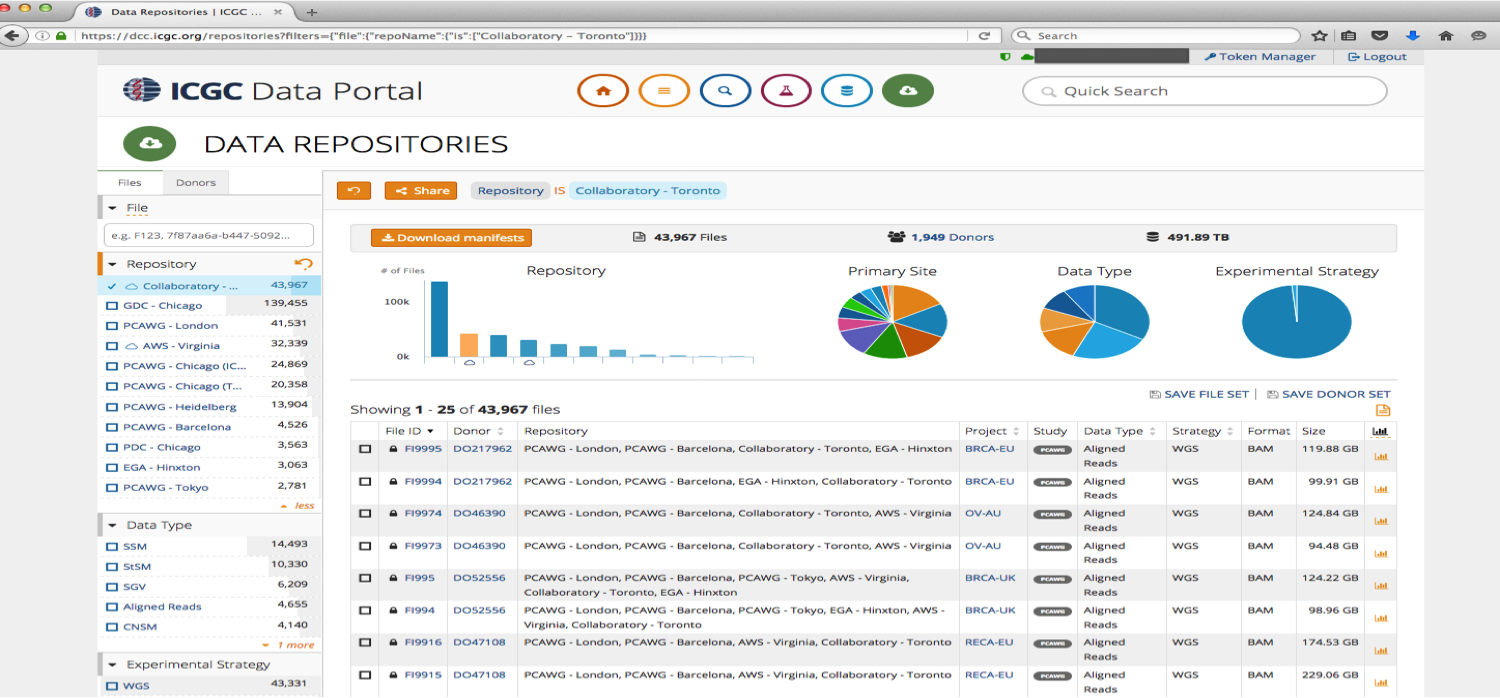
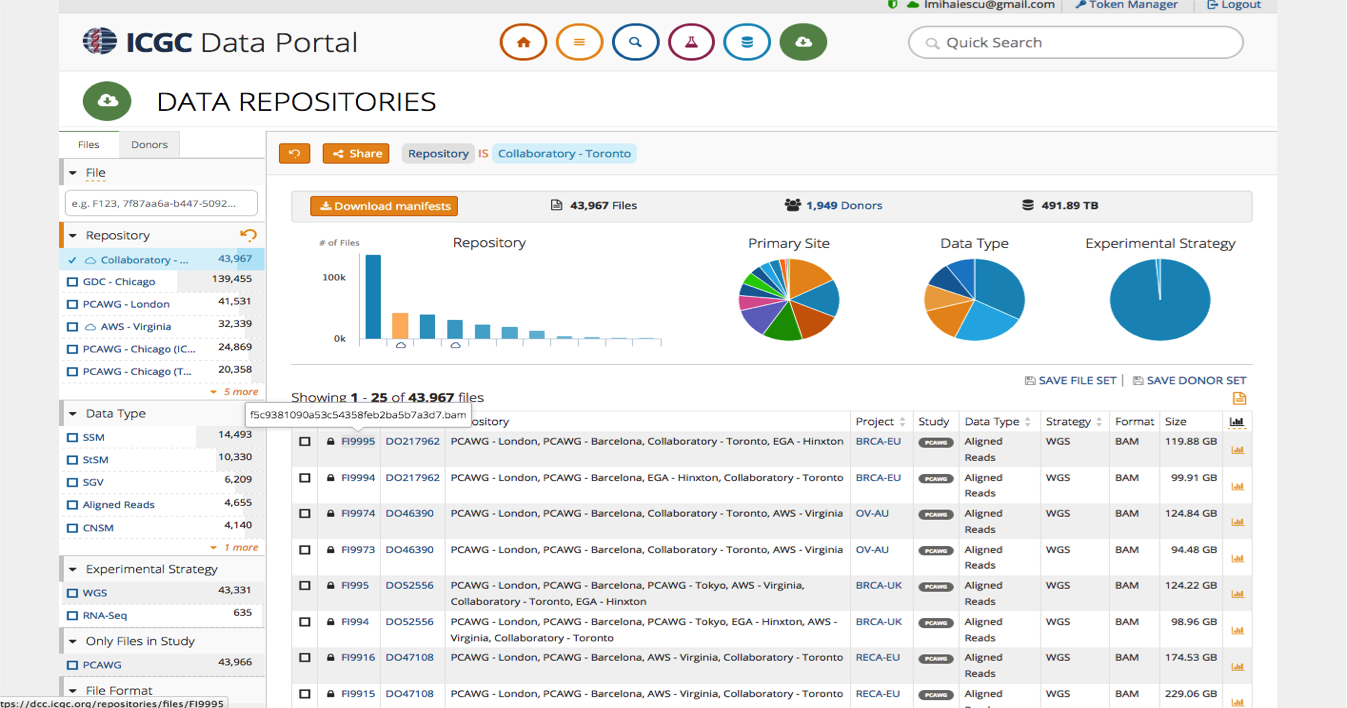
ICGC (stored at GNOS sites, Collaboratory, AWS S3) and TCGA (stored at cgHub and GDC) are indexed at https://dcc.icgc.org/repositories.
Other data sets are usually available on-line and can be accessed over HTTP(s) protocol.
Data repositories have different access policies and download clients: http://docs.icgc.org/cloud/repositories/#download-client-operation_1
OICR created a unified client that can be used to download data from multiple repos http://docs.icgc.org/cloud/icgc-get/ which is under active development, so for this lab we will use the “storage client”.
Collaboratory Data
You need DACO approval to access ICGC data stored in the Cloud, but for this workshop we uploaded a set of BAM files that are open access which can be used to test the functionality of the storage client. The same methodology can be used to download protected data, if a valid access token is used.
Below is the list of open-access BAM files and their object IDs:
HCC1143.bam.bai         dae332b8-107f-5e58-aefa-5c00de5d0bb3
HCC1143_BL.bam          561d9ddf-bbbc-5988-91c5-3c46d0d67ebe
HCC1143_BL.bam.bai      40c1b7a1-980e-57c5-9b82-538f1fdd5fc1
HCC1143_BL.RG1.bam      caa34f59-f93f-53d3-aca0-03a18b8f7892
HCC1143_BL.RG2.bam      09a31178-48e9-5632-9085-a8a34c6144e3
HCC1143_BL.RG3.bam      08a65e40-4ff0-547d-89cf-b0a2859a5602
HCC1143_BL.RG4.bam      ddd9d9e0-ac67-50b4-8a57-d8854372269c
HCC1143_BL.RG5.bam      3825dd85-cd0c-5121-9c05-0ce3e5883a08
HCC1143_BL.RG6.bam      fd858cf7-e19b-566a-98cc-63516d607f2d
HCC1143_BL.RG7.bam      9ea3f173-2c6a-5dc8-974c-a0887f99c15f
HCC1143_BL.RG8.bam      75931e5b-ac08-57d6-b6d2-792e1609c588
HCC1143_BL.RG9.bam      cff12c98-3ce7-5afa-8509-ba4a69880119
HCC1143_BL.RG10.bam     95ce9fda-b0aa-5e79-ae2b-74555031fee4
HCC1143_BL.RG11.bam     350d1d46-ddd1-5d67-bad0-94b29358cd2a
HCC1143_BL.RG12.bam     927dd39e-1199-55ac-b051-58b738c88bcb
HCC1143_BL.RG13.bam     147356e1-80cb-598a-ad0b-86007b92cb5e
HCC1143_BL.RG14.bam     b5e1eb25-c297-53f9-b04f-0261b7c2a1f7
HCC1143_BL.RG15.bam     9717921b-67f3-5914-8c66-db3ef1ad6d61
HCC1143_BL.RG16.bam     891f33b1-b355-525e-a4e4-87a0397f5be4
Storage Client
In addition to a token scoped for the right environment (AWS or Collaboratory), you need a storage client in order to download ICGC data.
The storage client is provided as a tarball or packaged in a Docker container (http://docs.icgc.org/cloud/guide/).
Advanced functionality provided by the storage client:
- Fast parallel download of remote objects with option to resume an interrupted download session
- Single file download or manifest based download
- Generate a pre-signed temporary URL (24 hours) for a file that can be used to download with WGET or cURL
Create a Configuration File
By default, the storage client only uses a single core for downloading, so it’s important to adapt its configuration to your local environment.
First, determine how many cores and how much memory you can allocate to the download.
cat /proc/cpuinfo | grep -c processor
free -g
On a VM with 8 cores and 55 GB of RAM, you can allocate 7 cores and 49 GB of RAM (7 GB per thread). Create a text file application.properties that contains the access token and the number of cores and memory per core. Use cat to view the file contents.
cat application.properties
#accessToken=XXX ## you would have to uncomment this line and add a valid ICGC token in order to access protected-data
transport.parallel=7
transport.memory=7
How to Download Data using the storage client
Pull the Docker container containing the storage client.
sudo docker pull icgc/icgc-storage-client
Choose an object_id from the list above containing open-data files, and initiate the download, mounting the application.properties file as well as the destination directory for the download (-v /tmp/:/data), so it survives the termination of the Docker container:
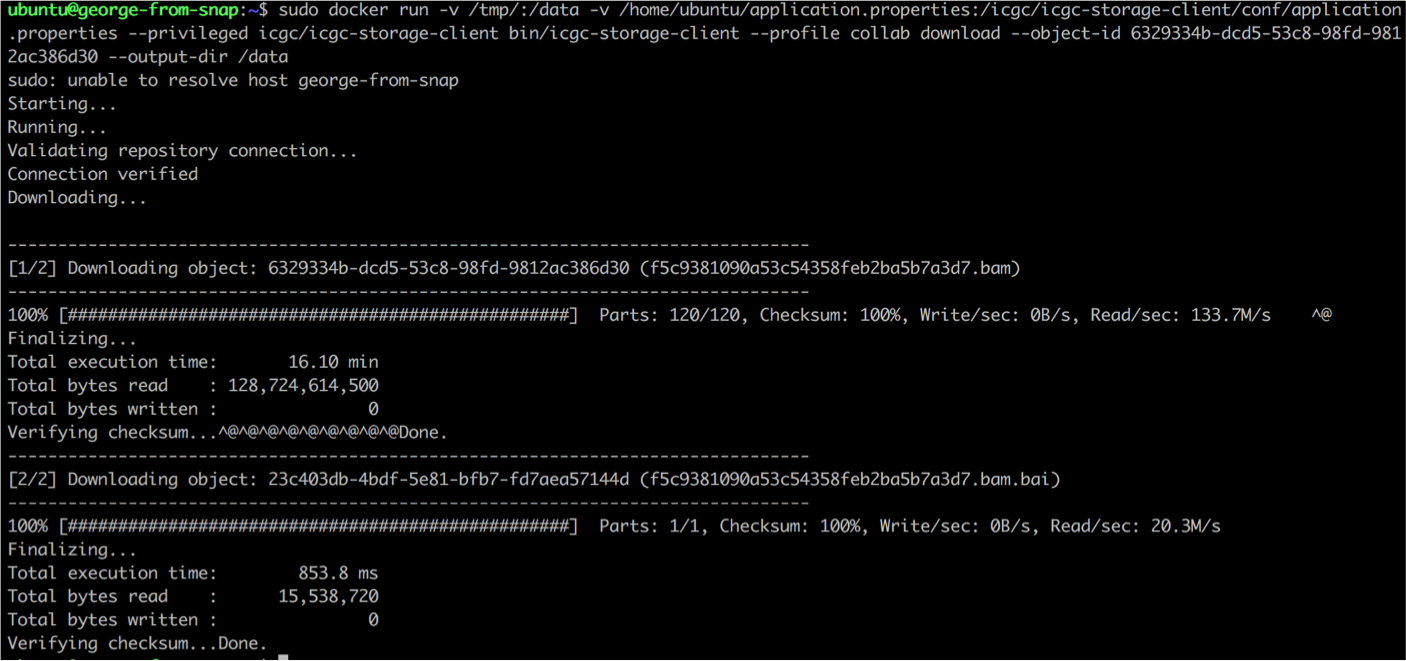
sudo docker run -v /tmp/:/data -v /home/ubuntu/application.properties:/icgc/icgc-storage-client/conf/application.properties --privileged icgc/icgc-storage-client bin/icgc-storage-client --profile collab download --object-id OBJECT_ID --output-dir /data
It takes around 30 min for a 120 GB file to be downloaded using a VM with 8 cores and 56 GB of RAM, including the time needed by the storage client to perform an automated checksum to verify downloaded data integrity.
The download speed depends on the disk IO which is shared with other VMs running on the same physical server, as well as other shared resources (network, storage cluster).
Important Notes
ICGC data stored in AWS S3 is only available from EC2 instances.
Download of ICGC protected data from S3 is only available within the “us-east-1” EC2 region of AWS.
ICGC data stored in Cancer Genome Collaboratory is only available from VMs inside Collaboratory, or from external IP addresses listed on the user enrollment form.
It is the responsibility of the users to protect access to the EC2 or Collaboratory VMs, as well as the restricted data they have access to.
Do not snapshot a VM that contains confidential tokens or protected data if the snapshot is intended to be shared with other cloud users. Also, keep in mind that other member of the same project as you could start instances from your snapshot and by doing so, have access to the data or tokens you left inside.