Bioinformatics on Big Data Module 4 Lab
This lab was created by George Mihaiescu
Introduction
Description of the lab
Welcome to the lab for Sharing and Scaling a VM!
After this lab, you will be able to:
- Snapshot a VM and share it with other cloud tenants.
- Launch a new VM from a shared image.
- Scale out your VMs to meet the needs of this task.
Things to know before you start:
The lab may take between 1-2 hours, depending on your familiarity with Cloud Computing and VMs.
Requirements
- Laptop connected to OICR’s wifi network
- Web browser
- The VM from Module 3 Lab
Log back into the VM configured in Module 3.
For Mac/Linux Users
To log back in, open terminal and type:
ssh -i path_to_private_key ubuntu@142.1.177.XXX
XXX is the last octet from the floating IP address you assigned to the instance.
For Windows Users
To log back in, open PuTTY and double-click on “Collaboratory” to login.
Customize Your VM
Install some packages and create a new file containing your name and your favorite food.
sudo apt-get –y install vim atop
echo "My name is <your name> and my favourite food is <food>" > /home/ubuntu/student
Prepare to Take a Snapshot
SSH into the VM configured in Module 3 Lab
Clean Up Its History
rm -i ~/.bash_history
Note: the -i option in rm will prompt you to answer yes or no to remove a file. It’s a good idea to use -i with rm so that you don’t inadvertently delete the wrong thing.
Remove your public key from the default user’s “authorized_keys” file, so they don’t have free access to virtual machines based on the snapshot.
rm –i ~/.ssh/authorized_keys
Note: after removing your public key you will not be able to log in again into this virtual machine, and you will have to start a new one from the snapshot. Your VM session may suspend while you take the snapshot. Initiating a new ssh session will fail because the public key was removed.
Take the Snapshot
In your browser, go to https://console.cancercollaboratory.org. Log in using your provided credentials.
On the lefthand side, expand the “Compute” menu and then click on “Instances.” In the table, click on “Create Snapshot” for your instance.
Enter a descriptive name for your snapshot, preferably “your_name_snap” and click “Create Snapshot.”

Terminate the Old Instance
To terminate your old instance, place a check mark in the box beside the name of your instance and click on the red “Terminate Instances” button. In the dialogue box, verify the instance name and click on “Terminate Instance.”

Note: Make sure you are terminating your own instance and not someone else’s instance.
Start a New Image from the Snapshot
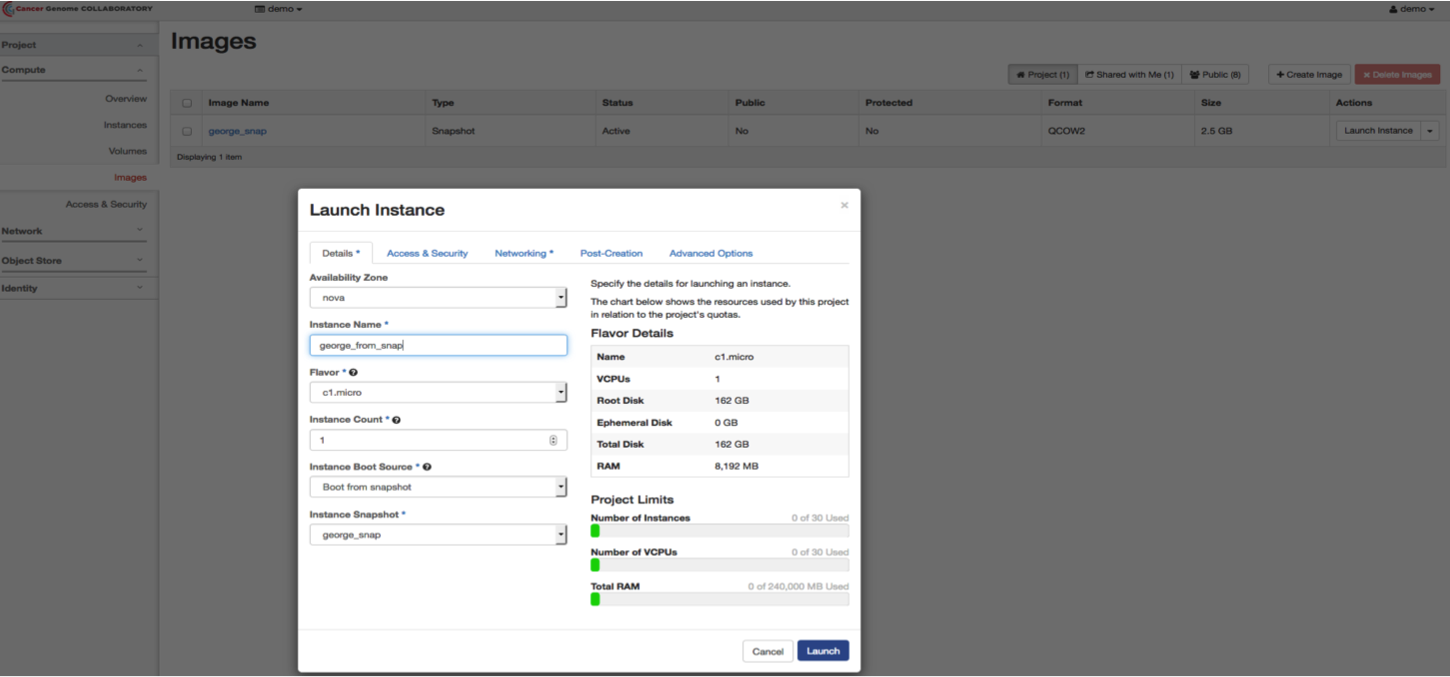
On the lefthand side, from the expanded “Compute” menu, select “Images.” In the table, you should see the snapshot that you just took. Click on “Launch Instance” for your snapshot.
The launch instance form will preselect the information from your image source. You can choose the same or a larger flavor when starting an instance from a snapshot but not a smaller flavor. Give your new instance a name. Assign a floating IP, then SSH into it and verify the packages you installed before are present. If you need help with this, see the instructions for lab 3.
Install the CLI Tool to Share Your Snapshot
In order to share the snapshot you took with other Openstack projects, you will need to use a CLI tool, python-glanceclient.
sudo apt-get -y install python-glanceclient
Download the Environment Variables
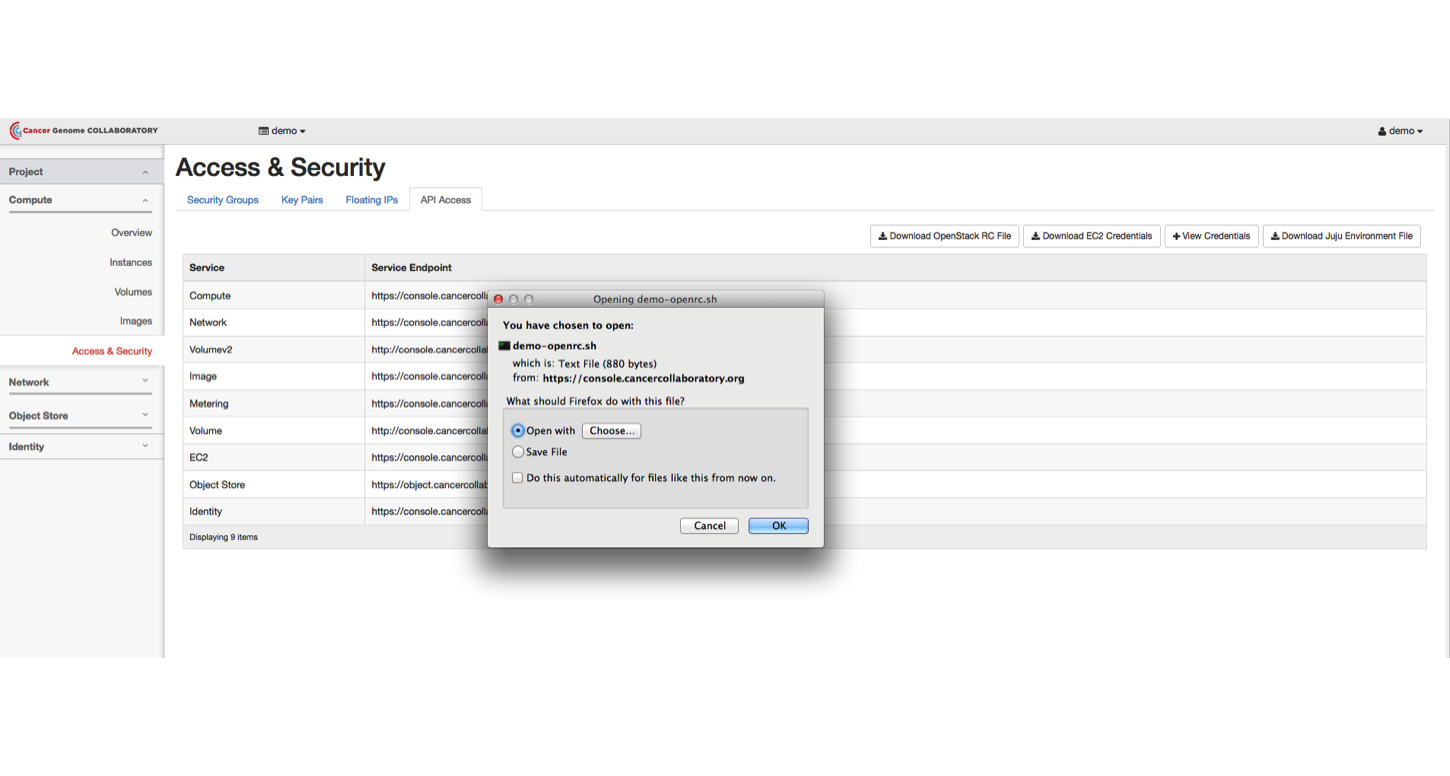
In your browser on the Collaboratory website, in the lefthand side in the expanded “Compute” menu, select “Access and Security.”
Click on the “API Access” tab. Click on the “Download OpenStack RC File.”
Source the Credentials
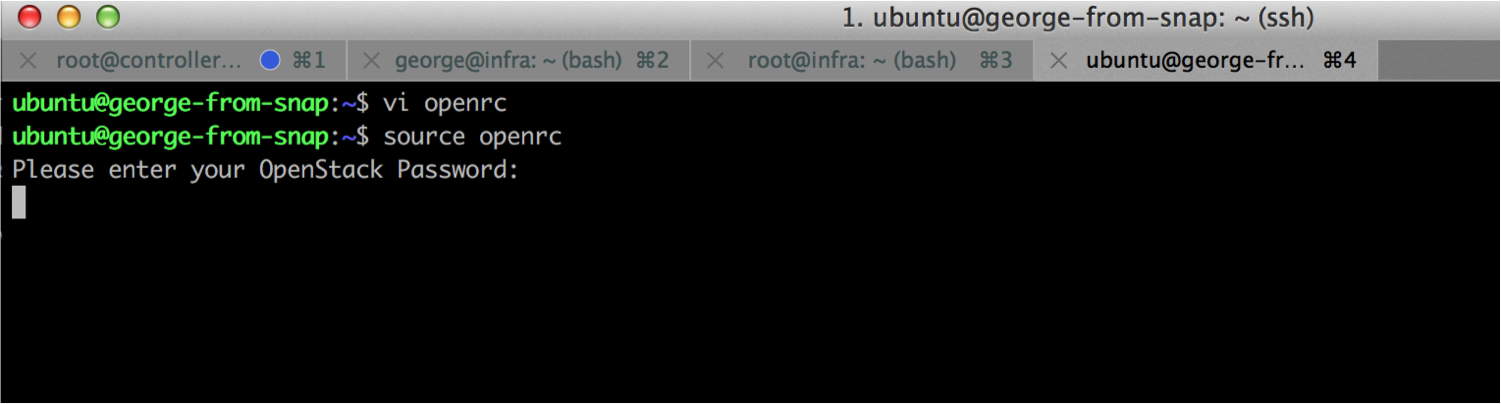
Create a file and paste the contents of the download, then source them.
If using vi as your editor, press “i” for insert and then CTRL+v to paste the file contents that you downloaded. Hit ESC to exit insert mode. Press :wq to save and exit.
Share the Snapshot
Execute the following commands to share the snapshot:
glance image-list # find the ID of the snapshot
In the list, find the ID of your snapshot.
Share it with the project ID a295a12382ef451b9bf2353d624455bb
glance member-create b42a556a-9525-4575-9828-9f01833a939d a295a12382ef451b9bf2353d624455bb
In the command, the first ID is the ID of your snapshot and the second ID is the project ID you wish to share with.
Now when the instructor whose project ID is a295a12382ef451b9bf2353d624455bb is on the Collaboratory site, in “Images” under the “Shared with Me” tab he will see a list of shared snapshots.
Using cloud-init to Bootstrap a VM
You can use cloud-init to automate all the steps that you did manually from the previous lab.
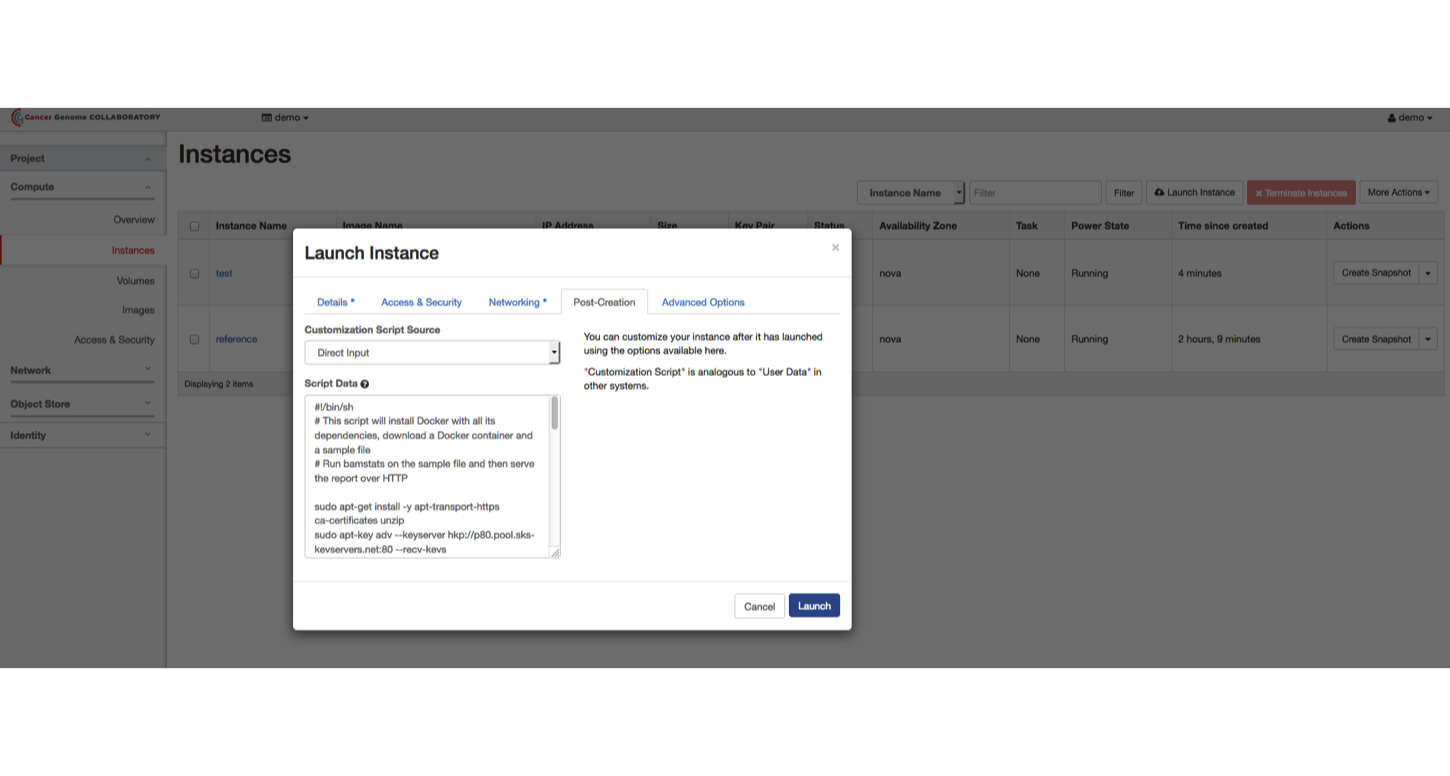
Launch a new Ubuntu 16.04 instance using flavor c1.micro. Under the “Post-creation” tab select “Direct Input” from the drop-down menu and paste the following:
#!/bin/sh
# This script will install Docker with all its dependencies, download a Docker container and a sample file
# Run bamstats on the sample file and then serve the report over HTTP

sudo apt-get install -y apt-transport-https ca-certificates unzip
sudo apt-key adv --keyserver hkp://p80.pool.sks-keyservers.net:80 --recv-keys 58118E89F3A912897C070ADBF76221572C52609D
echo 'deb https://apt.dockerproject.org/repo ubuntu-xenial main' | sudo tee /etc/apt/sources.list.d/docker.list
sudo apt-get update && sudo apt-get -y install linux-image-extra-$(uname -r) linux-image-extra-virtual
sudo apt-get -y install docker-engine
sudo service docker start
sudo docker run hello-world
sudo wget ftp://ftp.1000genomes.ebi.ac.uk/vol1/ftp/phase3/data/NA12878/alignment/NA12878.chrom20.ILLUMINA.bwa.CEU.low_coverage.20121211.bam -O /NA12878.chrom20.ILLUMINA.bwa.CEU.low_coverage.20121211.bam
sudo docker pull quay.io/briandoconnor/dockstore-tool-bamstats
sudo docker run -v `pwd`/NA12878.chrom20.ILLUMINA.bwa.CEU.low_coverage.20121211.bam:/NA12878.chrom20.ILLUMINA.bwa.CEU.low_coverage.20121211.bam -v /tmp:/home/ubuntu quay.io/briandoconnor/dockstore-tool-bamstats  /bin/bash -c "cd; /usr/local/bin/bamstats 4 /NA12878.chrom20.ILLUMINA.bwa.CEU.low_coverage.20121211.bam"
cd /tmp && unzip /tmp/bamstats_report.zip
cd /tmp && sudo python3 -m http.server 80 &
Monitor the bootstrap progress by checking the boot console output in “Instance details” under the “Log” tab.
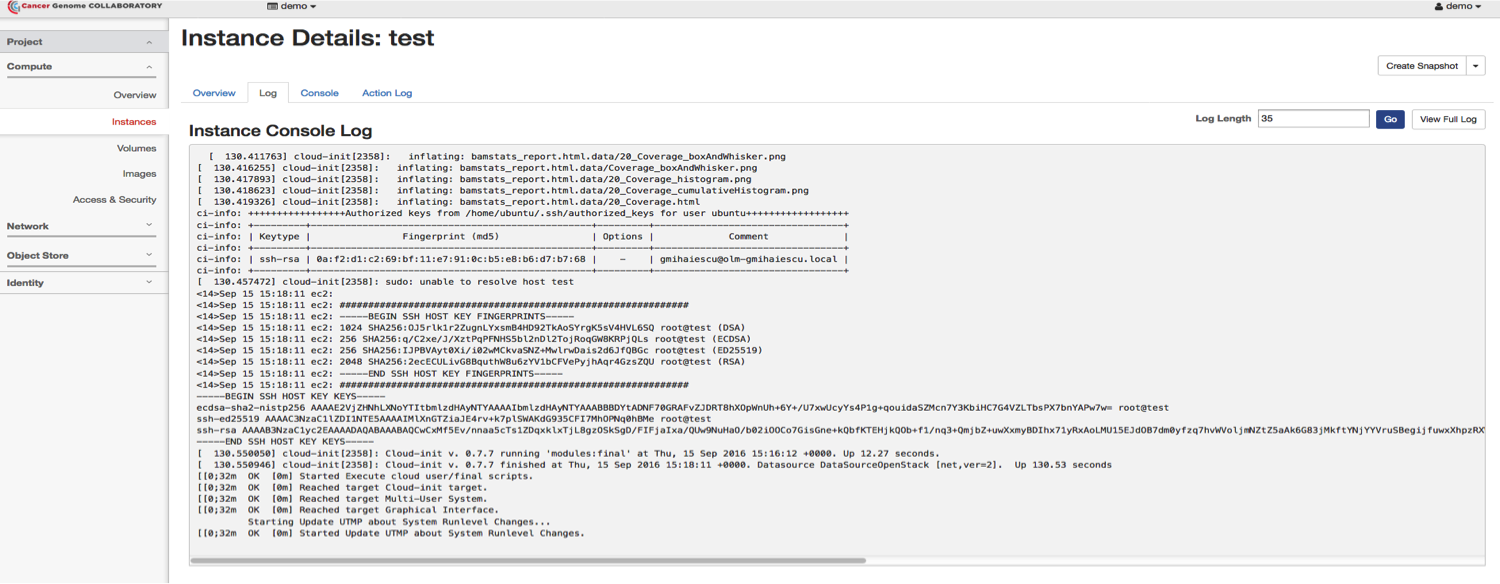
When this completes, you can assign a floating IP. If you browse to the IP, you can see the bamstats report.