Module 2 Lab: ChIP-Seq Alignment, Peak Calling (Enrichment Regions Detection), and Visualisation
By Misha Bilenky
Reference Genomes
Genomes for different species can be found at:
or
On Guillimin
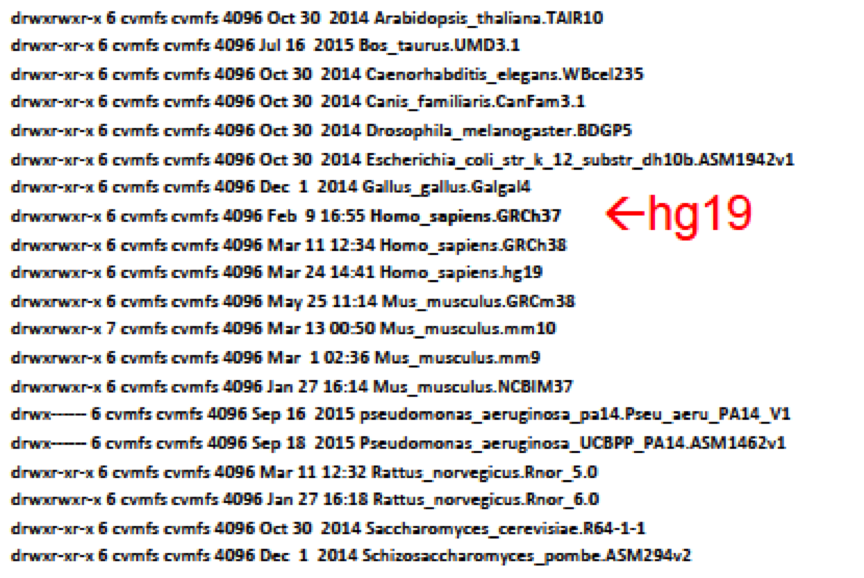
cd /cvmfs/ref.mugqic/genomes/species/
ls -l

cd ./Homo_sapiens.GRCh37/genome
ls -l
Which are the genome fasta file and index?
Using BWA
BWA executable is installed for you
Let’s define a variable
BWA=/cvmfs/soft.mugqic/CentOS6/software/bwa/bwa-0.7.12/bwa
Try to run $BWA without parameters
What happens?
Alignment Example
Toy example:
-
49990 reads
-
1.7M file size
located at:
/gs/project/mugqic/bioinformatics.ca/epigenomics/chip-seq/H1/data/H3K27ac/H3K27ac.H1.fastq.gz
Setting up the Variables
data=/gs/project/mugqic/bioinformatics.ca/epigenomics/chip-seq/H1/data/
genome=/cvmfs/ref.mugqic/genomes/species/Homo_sapiens.GRCh37/genome/bwa_index/Homo_sapiens.GRCh37.fa
mark=H3K27ac
f=$data/$mark/$mark.H1.fastq.gz
out=~/test/H3K27ac; mkdir -p $out
n=$mark.H1
Note: By changing H3K27ac to H3K36me3 you will align for another mark
Alignment Step: bwa aln
Try:
$BWA aln
You will see all the options/parameters and default values
Important parameters
Seed length
-l INT seed length [32]
Number of Mismatches
-k INT maximum differences in the seed [2]
Try:
$BWA aln $genome $f > $out/$n.sai
The .sai file is an intermediate file containing the suffix array indexes. Such file is afterwards translated into a SAM file.
NOTE if we align data from pair-end experiment we need to do alignment of both read1 and read2
As an example:
$BWA aln $genome $f1 > $out/$n1.sai
$BWA aln $genome $f2 > $out/$n2.sai
Alignment Step: Translation into SAM file
$BWA samse -f $out/$n.sam $genome $out/$n.sai $f
Resulting is a SAM file with a proper header etc.
To see the file:
less $out/$n.sam
To quit less, press q.
NOTE in case of pair end data
$BWA sampe [options] <genome> <in1.sai> <in2.sai> <in1.fq> <in2.fq> > out.sam
Alignment Step: Conversion of SAM to BAM and Sorting
Let’s define samtools variable:
SAMTOOLS=/cvmfs/soft.mugqic/CentOS6/software/samtools/samtools-1.3/bin/samtools
And convert the SAM to BAM and sort the BAM
$SAMTOOLS view -Sb $out/$n.sam > $out/$n.bam
$SAMTOOLS sort $out/$n.bam > $out/$n.sorted.bam
This was position sorting; Option -n gives name sorted BAM file
Now we can view bam file
$SAMTOOLS view -h $out/$n.sorted.bam | more
Check the size of SAM/BAM files
ls -lh $out
We can delete intermediate files (sai sam and unsorted bam):
rm $out/*.sa*
rm $out/$n.bam
Alignment Step: Marking Duplicates with Picard
Define location of PICARD jars:
PICARD=/cvmfs/soft.mugqic/CentOS6/software/picard/picard-tools-1.123/
Mark the duplicates
cd $out
java -jar -Xmx20G $PICARD/MarkDuplicates.jar I=$out/$n.sorted.bam O=$out/$n.sorted.dupsMarked.bam M=dups AS=true VALIDATION_STRINGENCY=LENIENT QUIET=true
Alignment Step: BAM file Statistics and Indexing
$SAMTOOLS flagstat $out/$n.sorted.dupsMarked.bam > $out/$n.flagstat
less $out/H3K27ac.H1.flagstat
Flagstat contains different BAM file statistics; check the file
$SAMTOOLS index $out/$n.sorted.dupsMarked.bam
Index $out/$n.sorted.dupsMarked.bam.bai file is generated; it allows samtool access BAM file from a given location
Alignment Step: Generating wig File
Define:
BAM=$out/H3K27ac.H1.sorted.dupsMarked.bam
SAMTOOLS=/cvmfs/soft.mugqic/CentOS6/software/samtools/samtools-0.1.19/samtools

BIN=/gs/project/mugqic/bioinformatics.ca/epigenomics/chip-seq/bin/

java -jar -Xmx2G $BIN/BAM2WIG.jar -bamFile $BAM -out $out -q 5 -F 1028 -cs -x 150 -samtools $SAMTOOLS > $out/wig.log

cat $out/wig.log

zcat $out/H3K27ac.H1.sorted.dupsMarked.q5.F1028.SET_150.wig.gz | head
Note: if wig.log says Output dir is not defined try retyping the java command (do not copy and paste it).
Alignment Step: Visualization
We would need to add a track header to the file
cd $out
gunzip *.wig.gz
H=/gs/project/mugqic/bioinformatics.ca/epigenomics/chip-seq/H1/data/H3K27ac/wig_track_header
cp $H $out/test.wig
less $out/H3K27ac.H1.sorted.dupsMarked.q5.F1028.SET_150.wig >> $out/test.wig
gzip $out/test.wig
zcat $out/test.wig.gz | head
Move test.wig to your local computer using WinSCP or scp.
In your browser, open http://genome.ucsc.edu
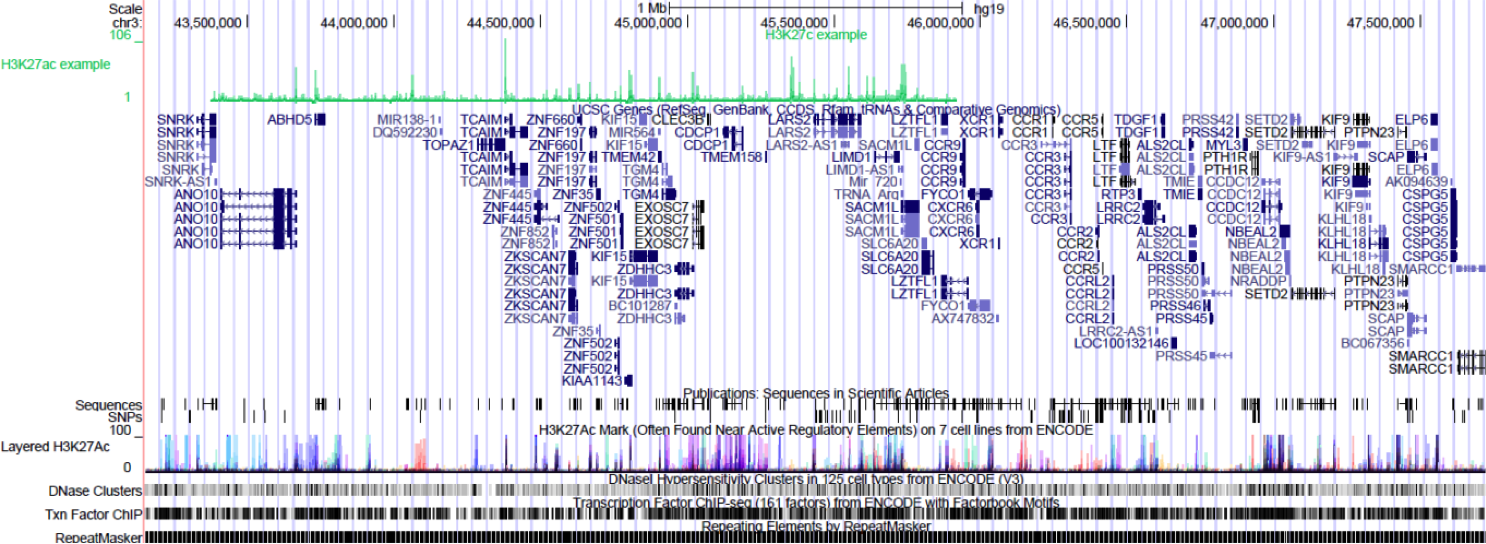
Select genomes and choose hg19.
Click the Manage custom tracks button.
Add custom track and browse to $OUT/test.wig.gz

Browse to the region of interest: chr3:43375889-45912052
Enriched Regions
We should use full size bam files in order to call enrichments (or at least bam file for a whole chromosome) as tools infer different distributions from the data and we need to have enough statistics
Run FindER on H3K27ac (just chr3)
First, set some variables.
mark=H3K27ac
dir=/gs/project/mugqic/bioinformatics.ca/epigenomics/chip-seq/H1/
sig=$dir/original/chr3/$mark.H1.bam
inp=$dir/original/chr3/Input.H1.bam
BIN=/gs/project/mugqic/bioinformatics.ca/epigenomics/chip-seq/bin/
out=~/test/FindER; mkdir -p $out
SAMTOOLS=/cvmfs/soft.mugqic/CentOS6/software/samtools/samtools-0.1.19/samtools
Now, run the command.
java -jar -Xmx10G $BIN/FindER_1_0_0.jar -signalBam $sig -inputBam $inp -SE -xsetI 150 -xsetS 150 -bin 150 -v -out $out -samtools $SAMTOOLS -regions 3 &> $out/$mark.log
Run MACS2
Setting up Python environment
export PATH=/cvmfs/soft.mugqic/CentOS6/software/python/Python-2.7.8/bin:/cvmfs/soft.mugqic/CentOS6/software/MACS2/MACS2-2.1.0.20151222/bin:$PATH
export PYTHONPATH=/cvmfs/soft.mugqic/CentOS6/software/MACS2/MACS2-2.1.0.20151222/lib/python2.7/site-packages:$PYTHONPATH
out=~/test/macs2; mkdir -p $out

macs2 callpeak -t $sig -c $inp -f BAM -g hs -n $out/$mark.v.Input.chr3 -B -q 0.01 &> $out/$mark.v.Input.chr3.log
Running macs in a standard (narrow peak mode) with a q-value threshold 0.01
Broad mode (for H3K36me3, H3K27me3, for example)
For example:
macs2 callpeak -t ChIP.bam -c Control.bam --broad -g hs --broad-cutoff 0.1
# where ChIP.bam is your ChIP-Seq bam and Control.bam is your control input bam
Load MACS2/FindER track to UCSC
Post-process mac2 file
cd $out
cp /gs/project/mugqic/bioinformatics.ca/epigenomics/chip-seq/H1/macs2/macs_track macs2.bed
less H3K27ac.v.Input.chr3_peaks.narrowPeak | cut -f1-3 | awk '{print "chr"$0}' >> macs2.bed
Move both files to your local computer using WinSCP or scp.
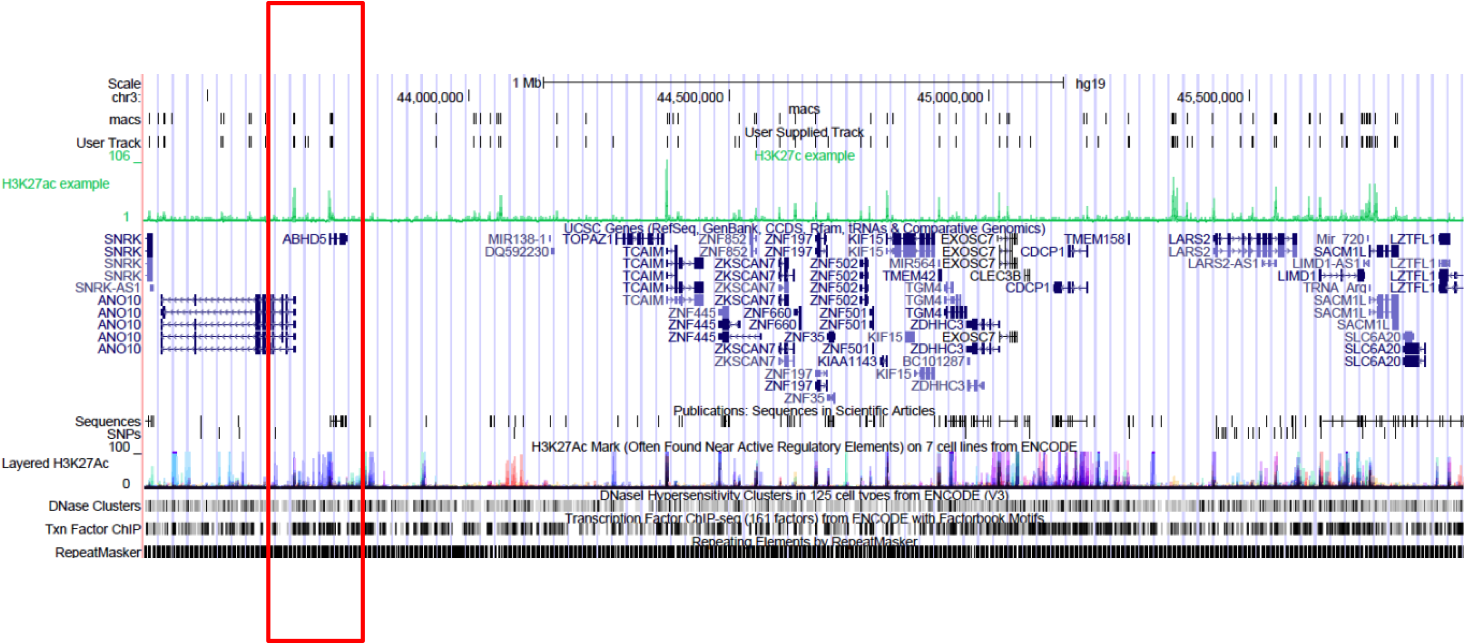
Now load both files into UCSC
macs output file: macs2.bed
FindER output file: H3K27ac.H1.vs.Input.H1.bin_150.FDR_0.05.FindER.bed.gz
You should now see BED tracks.
