CBW HT-seq Module 7 - Galaxy lab
This lab was created by Florence Cavalli
Table of contents
- Load the data
- Create single interval
- Check the quality
- Convert the FASTQ quality format
- Trim the read and remove adapter sequence with Trimmomoatic
- Align the reads with BWA-mem
- Sort the sam/bam
- Convert bam to sam
- Indel realignment
- FixMates
- Mark duplicates
- Base recalibration
- Extract Metrics
- Call SNPs
- Filter the variants
- Annotate the variants
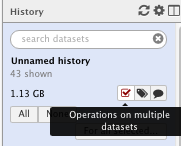
The “History options” menu
Workflow
Introduction
In this practical we will use Galaxy to perform the analysis you ran in Module 2 and Module 5. We are therefore using the dataset from patient NA12878 (reads extracted from region chr1:17704860-18004860)
We will use the galaxy website: https://usegalaxy.org/
Start by loging on the website with your username
The paramaters that need to be set or changed are specified in the text below (and in the images), keep the rest of the parameters with their default values
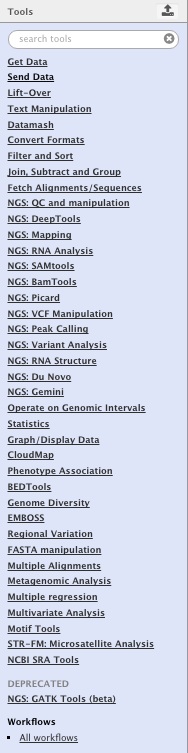
** indicates the tool to use for each step. You need to select it from the left column
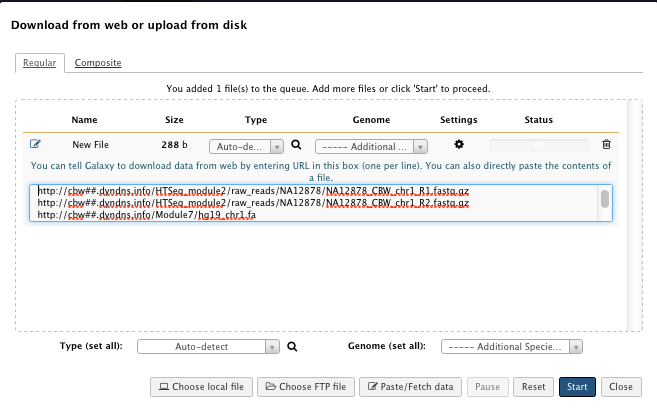
1) Load the data
“Paste/Fetch Data” box:
-
NA12878_CBW_chr1_R1.fastq.gz
http://cbw##.dyndns.info/HTSeq_module2/raw_reads/NA12878/NA12878_CBW_chr1_R1.fastq.gz -
NA12878_CBW_chr1_R2.fastq.gz
http://cbw##.dyndns.info/HTSeq_module2/raw_reads/NA12878/NA12878_CBW_chr1_R2.fastq.gz -
hg19_chr1.fa
http://cbw##.dyndns.info/Module7/hg19_chr1.fa -
dbSNP_135_chr1.vcf.gz
http://cbw##.dyndns.info/HTSeq_module2/reference/dbSNP_135_chr1.vcf.gz
replace ## by your student id
When the data is loaded and/or a task has finished to run, the file created is green. Grey indicates that the task is queueing, yellow that the task is beeing processed and red that an error occurred.
For example after loading the data, you should see the following in the history column on the right
File check:
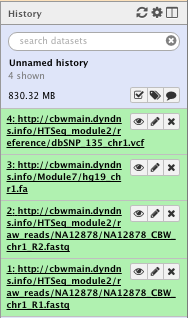
NOTE: Numbers and paths of the files may vary with usage
NOTE: The icons on the right of each file allow you to “Poke an eye”, edit the attribute or delete the file
2) Create single interval
We create an interval corresponding to the region of interest (we extracted reads from this region for this example dataset) to be used later on by different tools
** Text manipulation/Create Single Interval
- Chromosome: chr1
- Start position: 17704860
- End position: 18004860
- Name: chr1 interval

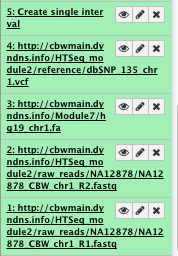
File check:
All the following steps are detailed in the Module 2 practical
3) Check the quality
BVAtools is not available on the galaxy website
You can use ** NGS: QC and manipulation/FastQC Read Quality reports instead
Since the tool in not avaible we will not run it but this is a very important step of the analysis, don’t skip it!
You can use FastQC at several points in your analysis on fastq, bam or sam files
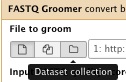
4) Convert the FASTQ quality format
** NGS: QC and manipulation/FASTAQ groomer convert between various FASTQ quality formats
- File to groom : NA12878_CBW_chr1_R1.fastq

Run FASTAQ groomer on the NA12878_CBW_chr1_R2.fastq file as well
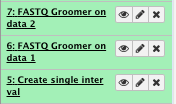
File check:
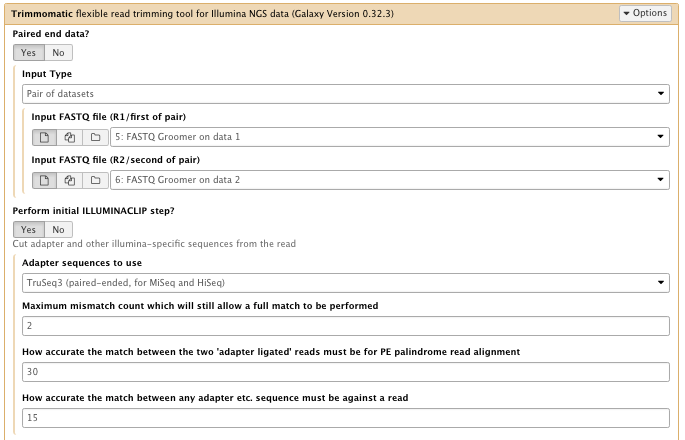
5) Trim the read and remove adapter sequence with Trimmomoatic
** NGS: QC and manipulation/Trimmomatic
- Input FASTQ file: FASTQ groomer results for xxx_R1.fastq and xxx_R2.fastq files
- Perform initial ILLUMINACLIP step :Yes
– Adapter sequence to use : TruSeq3 (paired-end, for MiSeq and HiSeq)
– Maximum mismatch count which will still allow a full match to be performed : 2
– How accurate the match between the two ‘adapter ligated’ reads must be for PE palindrome read alignment: 30
– How accurate the match between any adapter etc. sequence must be against a read: 15 - Select Trimmomatic operation to perform : insert Trimmomatic option
– TRAILING: 20
– MINLEN: 32
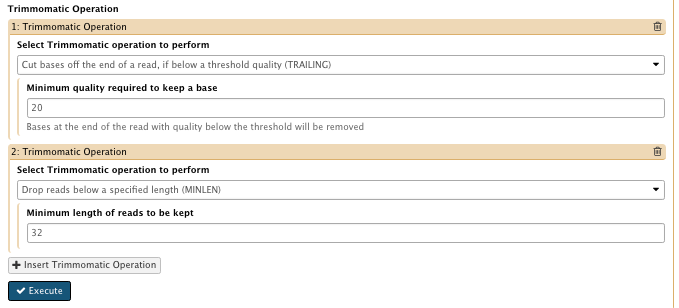
This creates 4 files, for paired and unpaired reads for both R1 and R2
Use the paired results for the alignment
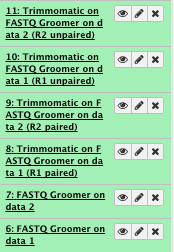
File check:
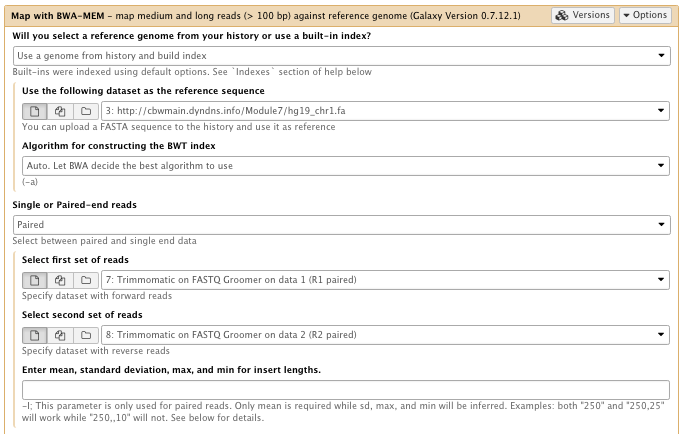
6) Align the reads with BWA-MEM
** NGS: Mapping/Map with BWA-MEM
- Will you select a reference genome from your history or use a built-in index? : Use a genome from history or build index
- Use the following dataset as the reference sequence: hg19_chr1.fa
- Select first set of reads: Trimmomactic on FASTQ groomer (R1 paired)
- Select second set of reads: Trimmomactic on FASTQ groomer (R2 paired)
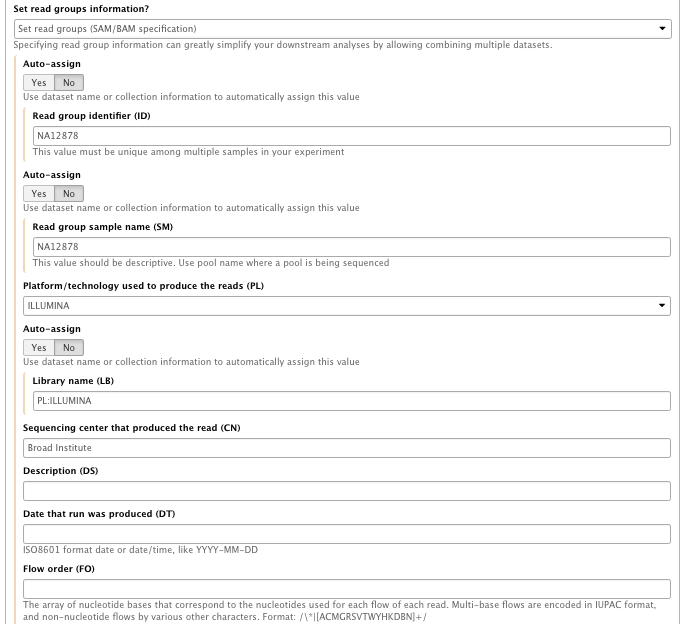
- Set the read groups information : Set read group SAM/BAM specification
with the following info
– Read group identifier (ID): NA12878
– Read group sample name (SM): NA12878
– Platform/technology used to produce the reads (PL): ILLUMINA
– Library name (LB):NA12878
– Sequencing center that produced the read (CN): Broad Institute
– Platform unit (PU): runNA12878_1 - Select Analysis node: 3. Full list of option
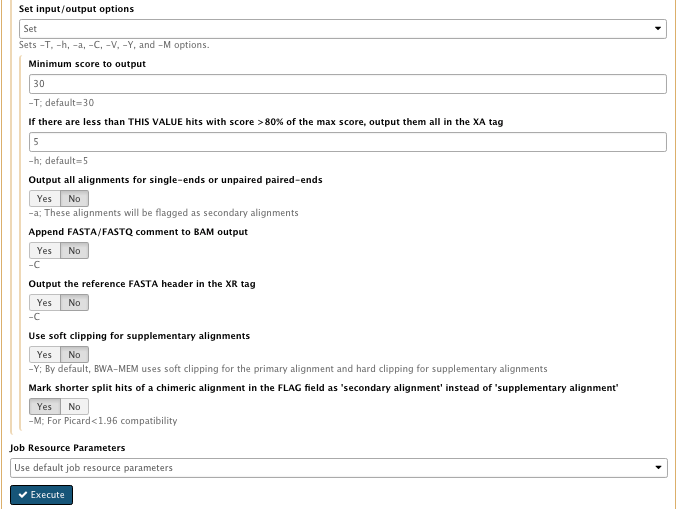
- Set input/output options : Set
- Mark shorter split hits of a chimeric alignment in the FLAG field as ‘secondary alignment’ instead of ‘supplementary alignment’: Yes -M; For Picard<1.96 compatibility
…

…
*** This step takes some time to run
File check:
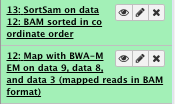
7) Sort the sam/bam
** NGS: Picard/SortSam sort SAM/BAM dataset
-
Select SAM/BAM dataset or dataset collection: map with BWA-MEM file
-
Sort order: coordinate
-
Select validation stringency: Silent
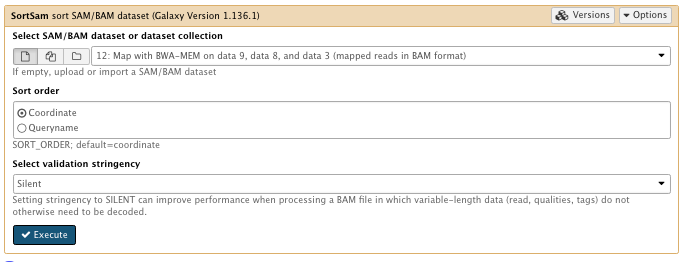
File check:
8) Convert bam to sam file (optional)
We will convert the bam file to a sam file to be able to look at it
You can run this at different point of your analysis
** NGS: SAMtools/BAM-to-SAM
- BAM File to Convert: sorted Bam file
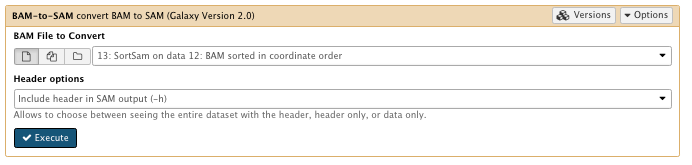
File check:

9) Indel realignment
** NGS GATK Tools/RealignerTargetCreator
- Choose the source for the reference list: History
- Bam file: sorted Bam file
- Using reference file: hg19_chr1.fa
- Basic or advance GATK option: Advanced
– Operate on Genomic intervals: Genomic intervals : created interval on chr1

…

** NGS GATK Tools/IndelRealigner
- Choose the source for the reference list: History
- Bam file: sorted Bam file
- Using reference file: hg19_chr1.fa
- Restrict realignment to provided intervals: Realigner Target create results
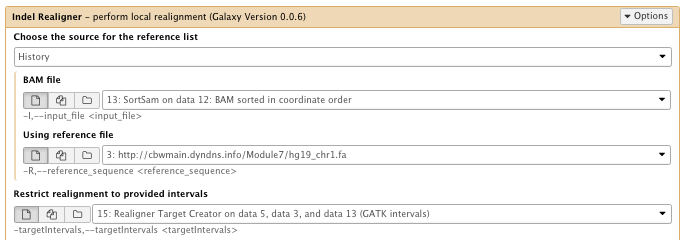
File check:
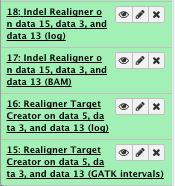
10) FixMates
**NGS: Picard/FixMateInformation
- Select SAM/BAM dataset or dataset collection: Indel Realigner result bam
- Select validation stringency: Silent
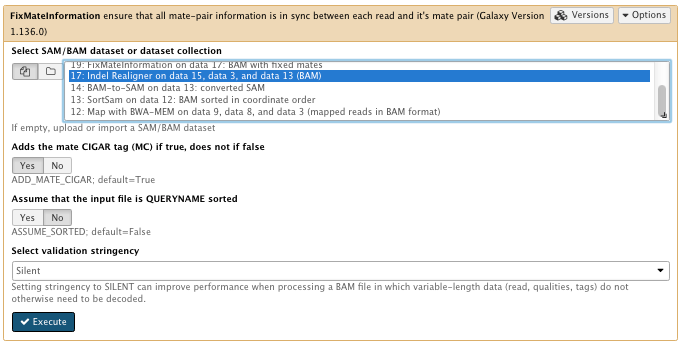
File check:
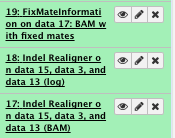
11) Mark duplicates
**NGS: Picard/MarkDuplicates
- Select SAM/BAM dataset or dataset collection: FixMateInformation result
- Select validation stringency: Silent

…

File check:
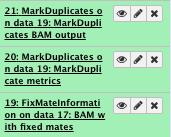
Have a look at the “Markduplicate metrics”
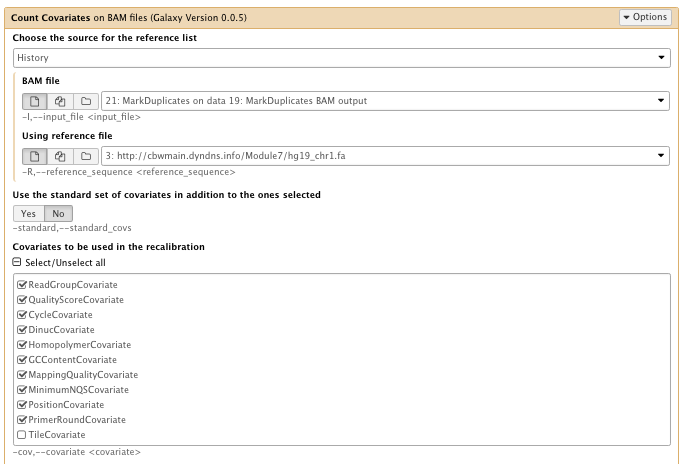
12) Base Recalibration
** NGS GATK Tools/BaseRecalibrator is not available!
So we can use “Count covariates” and “Table recalibration”. These two steps are the equivalent of BaseRecalibrator which is present in a newer version of GATK
** NGS: GATK Tools/Count Covariates on BAM files
- Choose the source for the reference list: History
- Bam file: marked duplicates file
- Using reference genome: hg19_chr1.fa
- Covariates to be used in the recalibration: Select all, then unselect “Tile covariate”
** NGS: GATK Tools/Table Recalibration on BAM files
- Covariates table recalibration file: Count Covariate
- Choose the source for the reference list: History
- Bam File: Marked duplicates file
- Using reference genome:hg19_chr1.fa
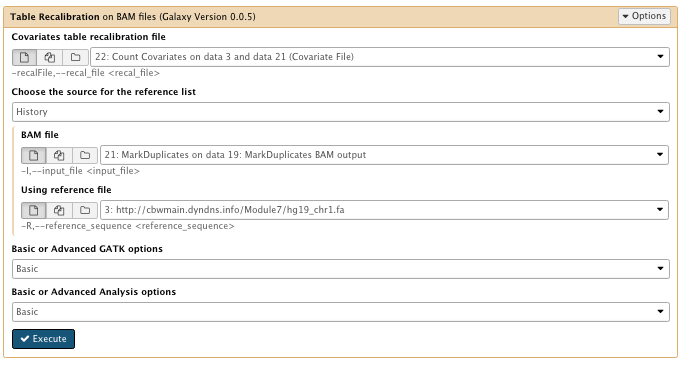
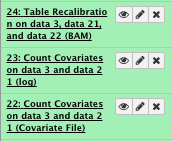
File check:
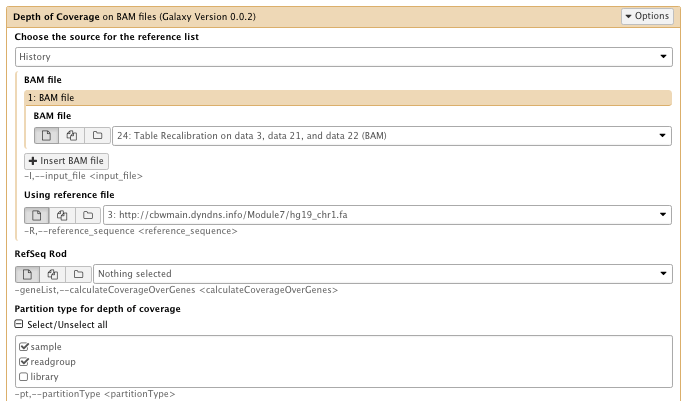
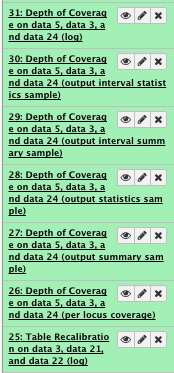
13) Extract Metrics
** NGS GATK Tools/Depth of Coverage on BAM files
- Choose the source for the reference list: History
- Bam file: Table recalibration result bam file
- Using reference genome: hg19_chr1.fa
- Partition type for depth of coverage: select sample and readgroup
- Summary coverage threshold
– for summary file outputs, report the % of bases covered to >= this number: 10, 25, 50 and 100 (insert 4 thresholds) - Basic or Advanced GATK options: Advanced
– Operate on Genomic intervals: Genomic intervals : created interval on chr1 - Basic or Advanced Analysis options: Advanced
– “Omit the output of the depth of coverage at each base”: Yes
…

…

…

…

** NGS: Picard/Collect Alignment Summary Metrics writes a file containing summary alignment metrics
- SAM/BAM dataset: Table recalibration result bam file
- Choose the source for the reference list: History
- Using reference genome: hg19_chr1.fa
- The level(s) at which to accumulate metrics set to: Read group, Sample
- Select validation stringency: Silent

…

File check:
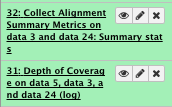
View “Collect Alignment Summary metrics”
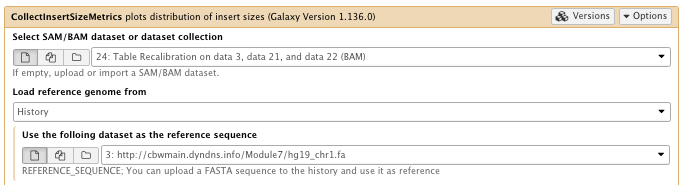
** NGS: Picard/CollectInsertSizeMetrics plots distribution of insert sizes
- SAM/BAM dataset: Table recalibration result bam file
- Choose the source for the reference list: History
- Using reference genome: hg19_chr1.fa
- The level(s) at which to accumulate metrics set to: Read group
- Select validation stringency: Silent
…
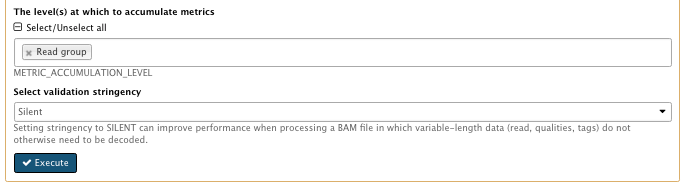
File check:
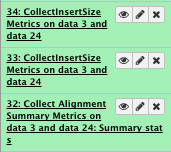
View “collectInsertSize Metrics” and pdf file
Variant calling and annotation from Module 5
All the following steps are detailed in the Module 5 practical
To continue you can use the aligned, sorted, marked duplicates and quality recalibrated files that you just created or download the one you used in Module 5 from the server (http://cbw##.dyndns.info/module5/NA12878.bwa.sort.rmdup.realign.bam, ## being your student id).
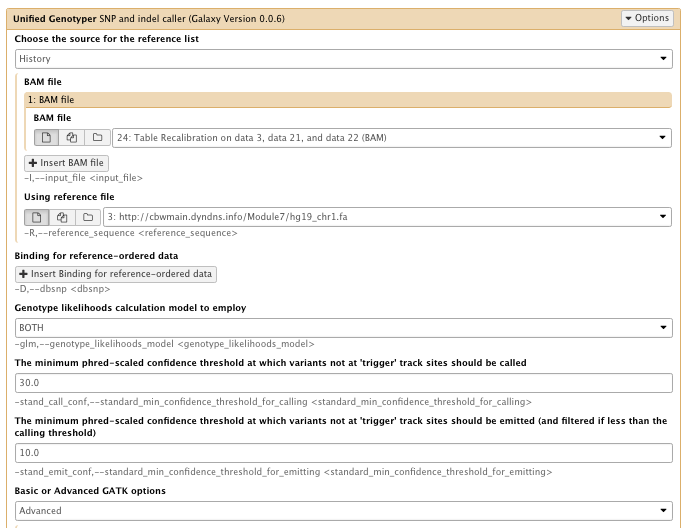
14) Call SNPs
** NGS GATK Tools/Unified Genotyper SNP and indel caller
- Choose the source for the reference list: History
- BAM file: Table recalibration result bam file
- Using reference genome: hg19_chr1.fa
- The minimum phred-scaled confidence threshold at which variants not at ‘trigger’ track sites should be emitted (and filtered if less than the calling threshold): 10
- Basic or Advanced GATK options: Advanced
– Operate on Genomic intervals: Genomic intervals : created interval on chr1
…

File check:
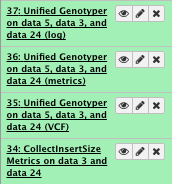
Have a look at the vcf file
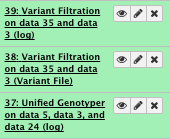
15) Filter the variants
Typically variant callers will only perform a minimal amount of filtering when presenting variant calls. In the case of GATK, we are actively removing any variant with score less than 10. Any variant with a score less than 30 is labeled with the filter “LowQual”.
To perform more rigorous filtering, another program must be used. In our case, we will use the VariantFiltration tool in GATK.
NOTE: The best practice when using GATK is to use the VariantRecalibrator. In our data set, we had too few variants to accurately use the variant recalibrator and therefore we used the VariantFiltration tool instead.
** NGS GATK Tools/Variant Filtration on VCF files
- Choose the source for the reference list: History
- Variant file to annotate: Unified genotyper results file
- Using reference genome: hg19_chr1.fa
- Variant filter
set the 3 following filters
– filter Expression: QD < 2.0 Filter, name: QDFilter
– filter Expression: FS > 200.0 Filter, name: FSFilter
– filter Expression: MQ < 40.0 Filter, name: MQFilter
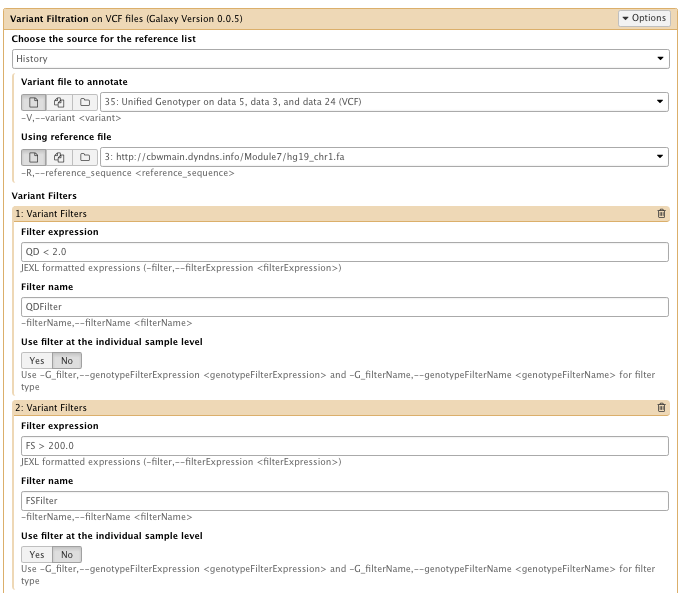
…
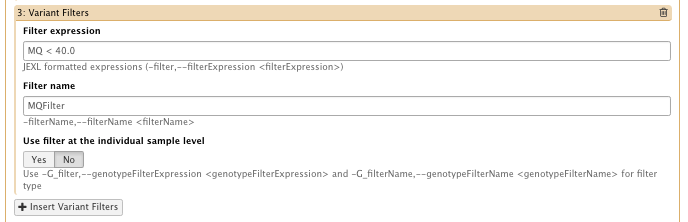
File check:
You can look at the output vcf file that contains “filter” annotation
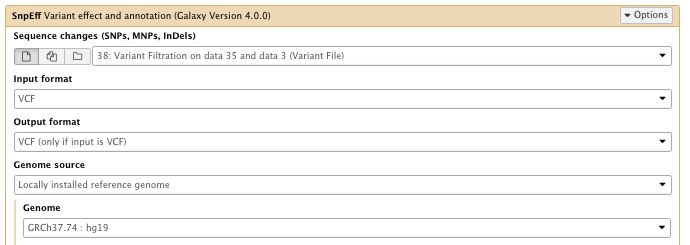
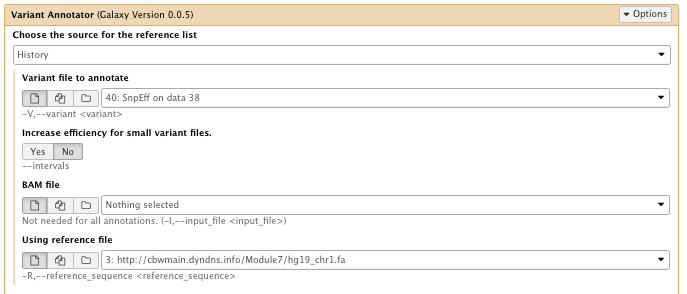
16) Annotate the variants
with snpEff
** NGS: Variant Analysis/SnpEff Variant effect and annotation
- Sequence changes: Variant Filtration result
- Filter output
–select “Do not show INTERGENIC changes”
…

File check:
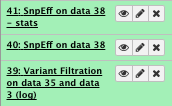
You can download the SnpEff stat html page and vcf file
with GATK VariantAnnotator
** NGS GATK Tools/VariantAnnotator
- Choose the source for the reference list: History
- Variant file to annotate: SnpEff vcf file
- Using reference file: hg19_chr1.fa
- Provide a dbSNP reference-ordered data file: set dbSNP
– ROD file: dbSNP_135_chr1.vcf.gz - Basic or Advanced GATK options: Advanced
– Operate on Genomic intervals: Genomic intervals : created interval on chr1
…

…

…

File check:
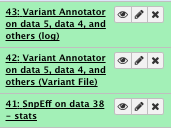
Look at or download your filtered and annotated variant vcf files
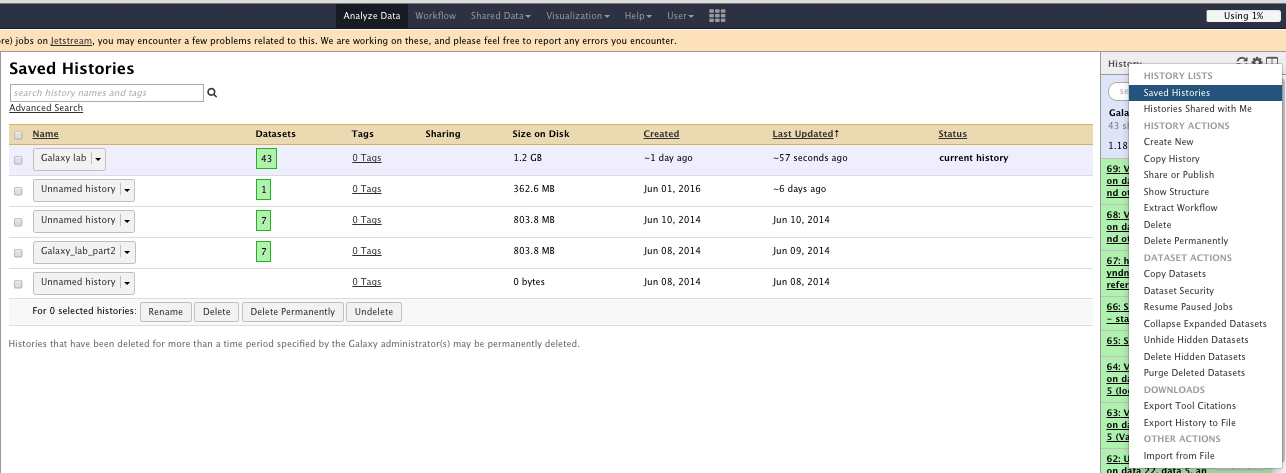
The “History options” menu
You can
- See saved histories
- Extract workflow
- Save your workflow
- Share your workflow
- …
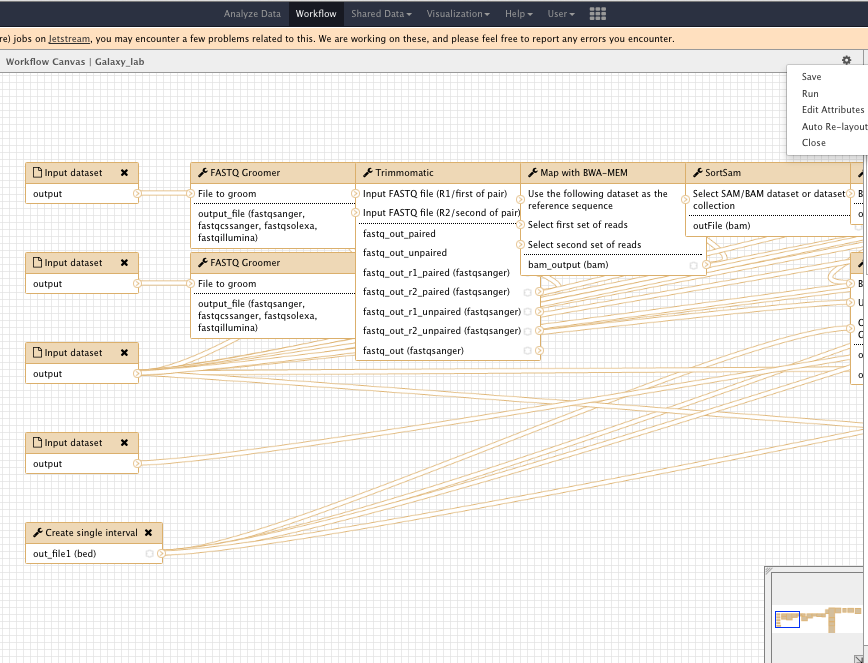
Workflow
Use the workflow tab
- Edit your worklow
- Rename input and output files
- Run your workflow on other samples
…
For information (we will not do it as part of the practical), you can run a tool and/or a given workflow on several samples at once. You will need to “Build List of Dataset Pairs” then run the tools on “Dataset collection”
- Select your input samples
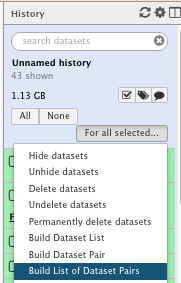
- Create your pairs
- Run a tool on your dataset collection
Next, you could…
- Create a new history, upload your input samples and run you workflow on them
- Continue using the tools on Galaxy
- Continue exploring/analysing/visualizing your data and results!
There are lots of tutorial, mainling list, videos for help (such as https://vimeo.com/galaxyproject)
We hope that you enjoyed using Galaxy!